Pode fazer com que o seu Raspberry Pi fale utilizando um sintetizador de voz como o eSpeak para o transformar num assistente inteligente. Este tutorial ajudá-lo-á a fazer o seu robô ou aplicação falar.
Hardware
- Raspberry Pi 3 avec Raspberry Pi OS
- Ligação à Internet e acesso remoto
Verificar os periféricos áudio
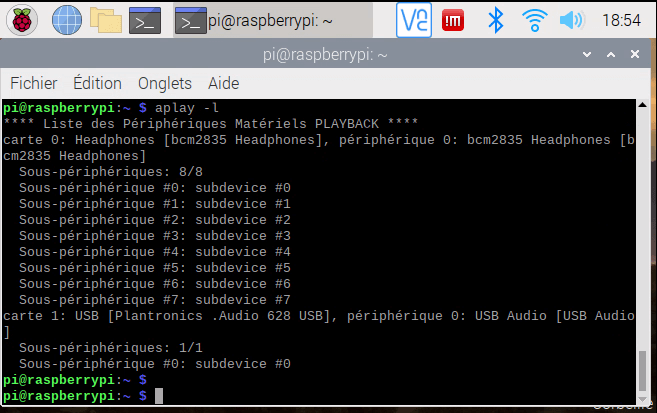
Vamos começar por verificar os periféricos de áudio disponíveis
aplay -l
Selecionar o dispositivo de áudio
Por defeito, o som é emitido através da porta jack ou HDMI. Se quiseres ligar auscultadores, tens de selecionar a saída correspondente na GUI do Raspberry Pi ou com o sudo raspi-config.

Verificar o áudio
Vamos começar por verificar se o áudio está a funcionar corretamente e se os periféricos de áudio são tidos em conta.
aplay /usr/share/sounds/alsa/*
Instalar o sintetizador de voz espseak
sudo apt-get install espeakPara testar a instalação do espeak, basta introduzir o seguinte comando:
espeak "Hello World"Também pode instalar o pacote python e utilizá-lo diretamente num script.
sudo apt-get install python3-espeafrom espeak import espeak
espeak.synth("hello world")
Para obter a lista de vozes disponíveis, introduza o comando
espeak --voicesUsando o eSpeak em um script Python com Subprocess
Pode executar comandos shell a partir de um script Python utilizando a biblioteca de subprocessos.
from time import sleep
import subprocess

def say(something, voice='fr+f1'):
	print("espeak -v {} {}".format(voice,something))
	subprocess.call(['espeak', '-v%s' % (voice), something])

text=[u"bonjour",u"aurevoir",u"a bientot", u"sa va", u"merci"]
textf=u"bienvenu admine, comment allez-vous aujourd'hui?"

for t in text:
	say(t)
	sleep(0.5)

say(textf)
Instalar o pyttsx3
Para usar o sintetizador de voz com Python, vamos usar o pacote pyttsx3.
Para instalar o pacote Python pyttsx3, introduza o seguinte comando:
pip3 install pyttsx3Escolha a voz que pretende
for i,voice in enumerate(voices):
	print("----------------{}".format(i))
	print(voice.id)
	engine.setProperty('voice', voice.id)  # changes the voice
	print(voice.age)
	print(voice.gender)
	print(voice.languages)
Código txt2speech
#!/usr/bin/python3.4
# -*-coding:Utf-8 -*

from time import sleep
import pyttsx3 as pyttsx
engine = pyttsx.init()
voices = engine.getProperty('voices')

print(voices)

engine.setProperty('voice', voices[0].id)  # changes the voice

#engine.setProperty('voice', voices[14].id)  # changes the voice
voiceNum=0
#Fr=[0 1 6 7 8 14] #6 = AC
"""
for voice in voices:
	print(voiceNum)
	voiceNum=voiceNum+1
	print(voice.id)
	engine.setProperty('voice', voice.id)  # changes the voice
	print(voice.age)
	print(voice.gender)
	print(voice.languages)
	print(voice.name)
"""

text=[u"bonjour",u"aurevoir",u"a bientot", u"sa va", u"merci"]
textf=u"bienvenu admine, comment allez-vous aujourd'hui?"

#rate = engine.getProperty('rate')
engine.setProperty('rate', 120)

#volume = engine.getProperty('volume')
#engine.setProperty('volume', volume)

for t in text:
	engine.say(t)
	sleep(0.5)

engine.say(textf)


engine.runAndWait()
Devias ouvir o teu Rapsberry Pi a falar!
Adicionar outras vozes
Pode criar e adicionar uma voz personalizada inspirando-se nas vozes existentes e lendo a documentação com atenção. Isto permitir-lhe-á concentrar-se em determinadas frases e pronúncias. Depois, quando dominar as definições, acabará por ter uma voz à sua medida.
Melhorar os resultados com os votos MBROLA
Pode utilizar outro sintetizador de voz um pouco mais potente do que o eSpeak e instalar novas vozes com o MBROLA. No nosso caso, estamos a instalar uma voz feminina francesa. Pode encontrar a voz que lhe convém na lista de vozes disponíveis.
Verificar se o mbrola existe. O seguinte comando dá-lhe as vozes disponíveis
apt-cache search mbrolamkdir espeak
cd espeak
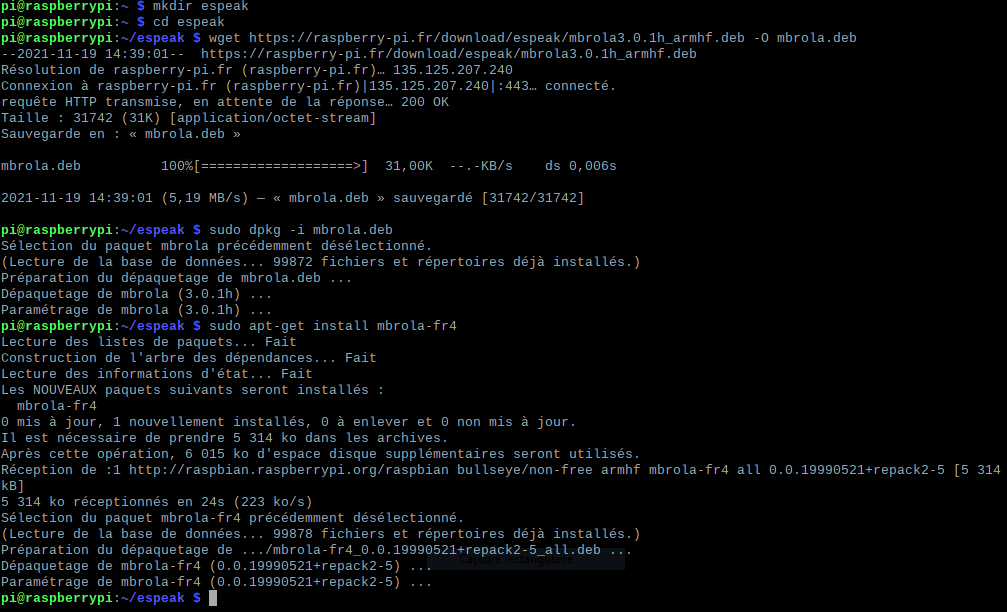
wget https://raspberry-pi.fr/download/espeak/mbrola3.0.1h_armhf.deb -O mbrola.deb
sudo dpkg -i mbrola.deb
rm mbrola.debUma vez instalado o mbrola, pode instalar novas vozes
sudo apt-get install mbrola-fr4
espeak -v mb-fr4 "bonjour admin, comment allez-vous?"N.B.: Pour installer le paquet mbrola, j’ai dû mettre à jour l’OS vers la version 11 (bullseye). Vous pouvez vérifier la version de l’os avec la commande cat /etc/os-release
Obviamente, as vozes mbrola não podem ser usadas com pyttsx3. Por isso, usamos o subprocesso
from time import sleep
import subprocess

def say(something, voice='mb-fr4'):
	print("espeak -v {} {}".format(voice,something))
	subprocess.call(['espeak', '-v%s' % (voice), something])

text=[u"bonjour",u"aurevoir",u"a bientot", u"sa va", u"merci"]
textf=u"bienvenu admine, comment allez-vous aujourd'hui?"

for t in text:
	say(t)
	sleep(0.5)

say(textf)
Saída de áudio HMDI
Se pretender utilizar a saída de áudio HDMI e não houver som, poderá ser necessário modificar o ficheiro config.txt
sudo nano /boot/config.txtDescomente a linha hdmi_drive=2
