Para ciertas aplicaciones, puede resultarte útil incrustar OpenCV en una interfaz PyQt. En este tutorial, veremos cómo integrar y gestionar correctamente un vídeo capturado por OpenCV en una aplicación PyQt.
N.B.: Utilizamos Pyside, pero la conversión a PyQt es bastante sencilla.
Requisitos previos:
- Instalación de Python
- Instalación de OpenCV (pip install opencv-python)
- PySide o PyQt (pip install pyside6 o pip install PyQt5)
Código para capturar un vídeo con OpenCV
Este es el código básico para visualizar un vídeo de webcam con openCV
import sys
import cv2

def main(args):

	cap = cv2.VideoCapture(0) #default camera

	while(True):
		ret, frame = cap.read()
		if ret:
			frame=cv2.resize(frame, (800, 600))
			cv2.imshow("Video",frame)

		if cv2.waitKey(1) & 0xFF == ord('q'): #click q to stop capturing
			break

	cap.release()
	cv2.destroyAllWindows()
	return 0

if __name__ == '__main__':

    sys.exit(main(sys.argv))
Para integrarlo en una aplicación PyQt, crearemos un objeto QThread que se encargará de reproducir el vídeo sin bloquear la aplicación.
- La función run es la función que contiene el código openCV que se ejecutará en un bucle cuando se llame a la función QThread.start.
- La función stop se utiliza para detener limpiamente el hilo
- La señal changePixmap se utiliza para indicar a la aplicación que hay una nueva imagen disponible
class Thread(QThread):
	changePixmap = pyqtSignal(QImage)

	def run(self):
		self.isRunning=True
		cap = cv2.VideoCapture(0)
		while self.isRunning:
			ret, frame = cap.read()
			if ret:
				rgbImage = cv2.cvtColor(frame, cv2.COLOR_BGR2RGB)
				h, w, ch = rgbImage.shape
				bytesPerLine = ch * w
				convertToQtFormat = QImage(rgbImage.data, w, h, bytesPerLine, QImage.Format_RGB888)
				p = convertToQtFormat.scaled(640, 480, Qt.KeepAspectRatio)
				self.changePixmap.emit(p)

	def stop(self):
		self.isRunning=False
		self.quit()
		self.terminate()
Creación de la aplicación PyQt
Para la aplicación, crearemos una QLabel en un simple QWidget que contendrá la imagen de video e instanciaremos el QThread. El video se actualizará automáticamente usando la función setImage, que es llamada cuando se recibe la señal changePixmap.
- Función setImage
	@pyqtSlot(QImage)
	def setImage(self, image):
		#update image
		self.label.setPixmap(QPixmap.fromImage(image))
- señal changePixmap
self.th.changePixmap.connect(self.setImage)
class VideoContainer(QWidget):
	def __init__(self):
		super().__init__()
		self.title = 'PySide Video'
		self.left = 100
		self.top = 100
		self.fwidth = 640
		self.fheight = 480
		self.initUI()

	@pyqtSlot(QImage)
	def setImage(self, image):
		#update image
		self.label.setPixmap(QPixmap.fromImage(image))

	def initUI(self):
		self.setWindowTitle(self.title)
		self.setGeometry(self.left, self.top, self.fwidth, self.fheight)
		self.resize(1200, 800)

		# create a label
		self.label = QLabel(self)
		self.label.resize(640, 480)
		self.th = Thread(self)
		self.th.changePixmap.connect(self.setImage)
		self.th.start()
		self.show()
Código completo para mostrar un vídeo en una ventana PyQt
import cv2
import sys
#from PyQt5.QtWidgets import  QWidget, QLabel, QApplication
#from PyQt5.QtCore import QThread, Qt, pyqtSignal, pyqtSlot
#from PyQt5.QtGui import QImage, QPixmap

from PySide6.QtWidgets import  QWidget, QLabel, QApplication
from PySide6.QtCore import QThread, Qt, Signal, Slot
from PySide6.QtGui import QImage, QPixmap
pyqtSignal = Signal
pyqtSlot = Slot

class Thread(QThread):
	changePixmap = pyqtSignal(QImage)

	def run(self):
		self.isRunning=True
		cap = cv2.VideoCapture(0)
		while self.isRunning:
			ret, frame = cap.read()
			if ret:
				# https://stackoverflow.com/a/55468544/6622587
				rgbImage = cv2.cvtColor(frame, cv2.COLOR_BGR2RGB)
				h, w, ch = rgbImage.shape
				bytesPerLine = ch * w
				convertToQtFormat = QImage(rgbImage.data, w, h, bytesPerLine, QImage.Format_RGB888)
				p = convertToQtFormat.scaled(640, 480, Qt.KeepAspectRatio)
				self.changePixmap.emit(p)

	def stop(self):
		self.isRunning=False
		self.quit()
		self.terminate()

class VideoContainer(QWidget):
	def __init__(self):
		super().__init__()
		self.title = 'Video'
		self.left = 100
		self.top = 100
		self.fwidth = 640
		self.fheight = 480
		self.initUI()

	@pyqtSlot(QImage)
	def setImage(self, image):
		#update image
		self.label.setPixmap(QPixmap.fromImage(image))

	def initUI(self):
		self.setWindowTitle(self.title)
		self.setGeometry(self.left, self.top, self.fwidth, self.fheight)
		self.resize(1200, 800)

		# create a label
		self.label = QLabel(self)
		self.label.resize(640, 480)
		self.th = Thread(self)
		self.th.changePixmap.connect(self.setImage)
		self.th.start()
		self.show()

if __name__ == '__main__':

		app = QApplication(sys.argv)
		ex = VideoContainer()
		sys.exit(app.exec())
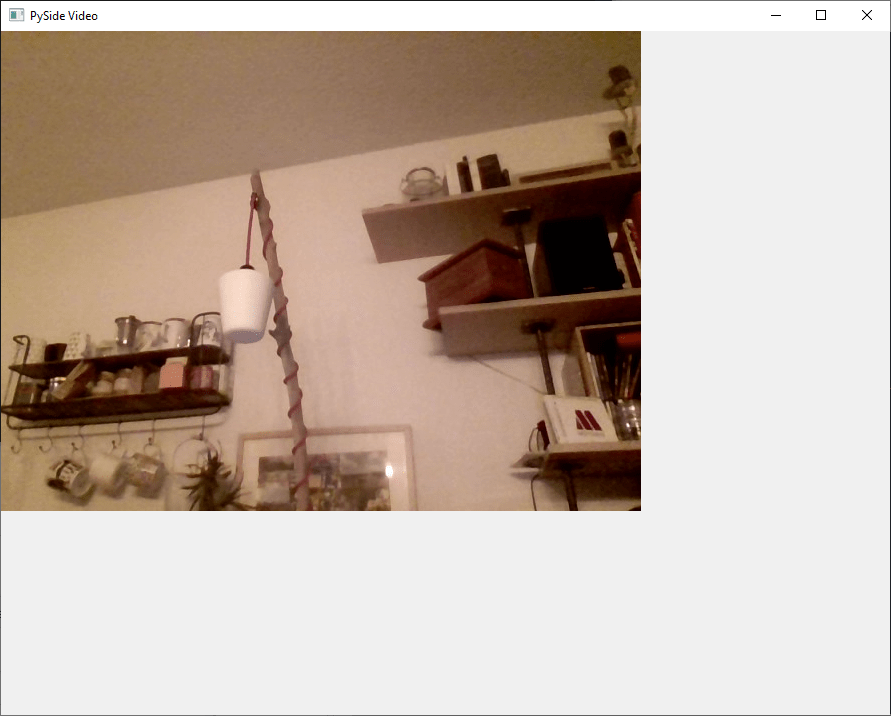
Aparece una ventana «Vídeo» con la imagen de la webcam.

Puedes adaptar este sencillo código para integrar un vídeo en una interfaz gráfica que te permita modificar las opciones del vídeo o trabajar con filtros, por ejemplo.
Bonificación: interfaz de cierre mejorada
El código funciona bien y puede ser suficiente, pero hay algunos problemas con esta implementación:
- La aplicación no se puede cerrar con Ctrl+C (KeyboardInterrupt)
- Al cerrar la ventana, el Qthread no se detiene
- Si cambia el tamaño de la ventana, el tamaño del vídeo no cambia
Para cerrar la aplicación con Ctrl+C, puedes utilizar la señal de interrupción añadiendo el siguiente código antes de llamar a la aplicación (existen métodos más limpios)
import signal #close signal with Ctrl+C
signal.signal(signal.SIGINT, signal.SIG_DFL)
Para finalizar el QThread cuando se cierra la ventana, puede utilizar la señal aboutToQuit de la aplicación para llamar a la función stop del QThread
app.aboutToQuit.connect(ex.th.stop) #stop qthread when closing window
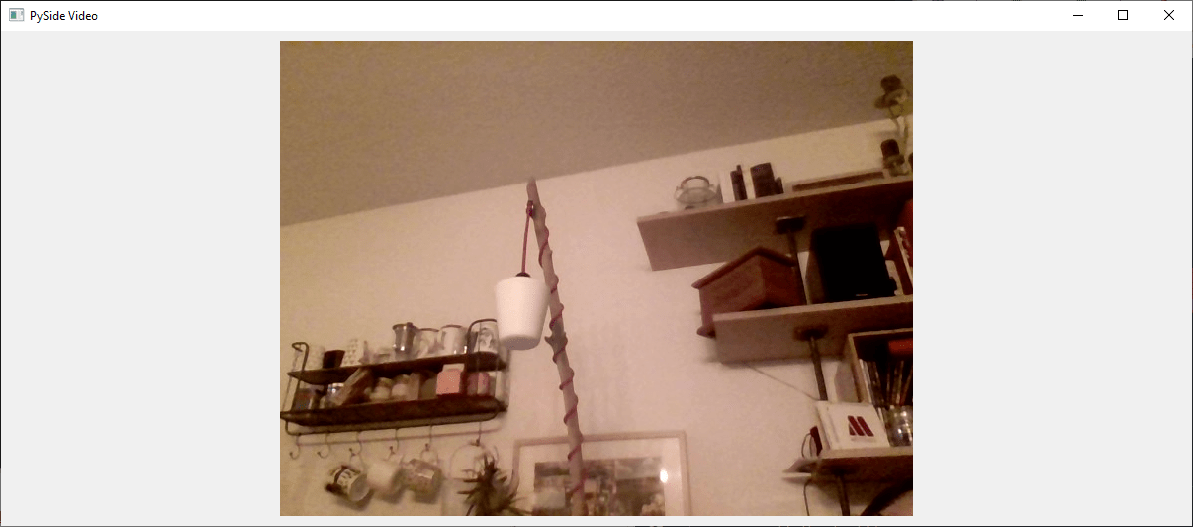
Por último, para redimensionar el vídeo con la ventana cada vez que se actualiza, utilizamos el tamaño de la ventana para calcular el tamaño de la imagen y la posición de la etiqueta, de modo que quede centrada y el vídeo conserve sus proporciones.
	@pyqtSlot(QImage)
	def setImage(self, image):
		#resize image with window and center
		imWidth=self.width()-2*self.padding
		imHeight=self.height()-2*self.padding
		image = image.scaled(imWidth, imHeight, Qt.KeepAspectRatio) # remove Qt.KeepAspectRatio if not needed
		self.label.resize(image.width(), image.height()) #(640, 480)
		self.label.move((self.width()-image.width())/2, (self.height()-image.height())/2)

		#update image
		self.label.setPixmap(QPixmap.fromImage(image))
Aquí está el código completo con las mejoras
import cv2
import sys
#from PyQt5.QtWidgets import  QWidget, QLabel, QApplication
#from PyQt5.QtCore import QThread, Qt, pyqtSignal, pyqtSlot
#from PyQt5.QtGui import QImage, QPixmap

from PySide6.QtWidgets import  QWidget, QLabel, QApplication
from PySide6.QtCore import QThread, Qt, Signal, Slot
from PySide6.QtGui import QImage, QPixmap
pyqtSignal = Signal
pyqtSlot = Slot

class Thread(QThread):
	changePixmap = pyqtSignal(QImage)

	def run(self):
		self.isRunning=True
		cap = cv2.VideoCapture(0)
		while self.isRunning:
			ret, frame = cap.read()
			if ret:
				# https://stackoverflow.com/a/55468544/6622587
				rgbImage = cv2.cvtColor(frame, cv2.COLOR_BGR2RGB)
				h, w, ch = rgbImage.shape
				bytesPerLine = ch * w
				convertToQtFormat = QImage(rgbImage.data, w, h, bytesPerLine, QImage.Format_RGB888)
				p = convertToQtFormat.scaled(640, 480, Qt.KeepAspectRatio)
				self.changePixmap.emit(p)

	def stop(self):
		self.isRunning=False
		self.quit()
		self.terminate()

class VideoContainer(QWidget):
	def __init__(self):
		super().__init__()
		self.title = 'PySide Video'
		self.left = 100
		self.top = 100
		self.fwidth = 640
		self.fheight = 480
		self.padding = 10
		self.initUI()

	@pyqtSlot(QImage)
	def setImage(self, image):
		#resize image with window and center
		imWidth=self.width()-2*self.padding
		imHeight=self.height()-2*self.padding
		image = image.scaled(imWidth, imHeight, Qt.KeepAspectRatio) # remove Qt.KeepAspectRatio if not needed
		self.label.resize(image.width(), image.height()) #(640, 480)
		self.label.move((self.width()-image.width())/2, (self.height()-image.height())/2)

		#update image
		self.label.setPixmap(QPixmap.fromImage(image))

	def initUI(self):
		self.setWindowTitle(self.title)
		self.setGeometry(self.left, self.top, self.fwidth, self.fheight)
		self.resize(1200, 800)

		# create a label
		self.label = QLabel(self)
		self.label.resize(self.width()-2*self.padding,self.height()-2*self.padding) #(640, 480)
		self.th = Thread(self)
		self.th.changePixmap.connect(self.setImage)
		self.th.start()
		self.show()

import signal #close signal with Ctrl+C
signal.signal(signal.SIGINT, signal.SIG_DFL)

if __name__ == '__main__':

		app = QApplication(sys.argv)
		ex = VideoContainer()
		app.aboutToQuit.connect(ex.th.stop) #stop qthread when closing window

		sys.exit(app.exec())


