Hardware
- Computer
- ArduinoUNO
- USB Cable
- Dupont Cable M/F x3
Scheme
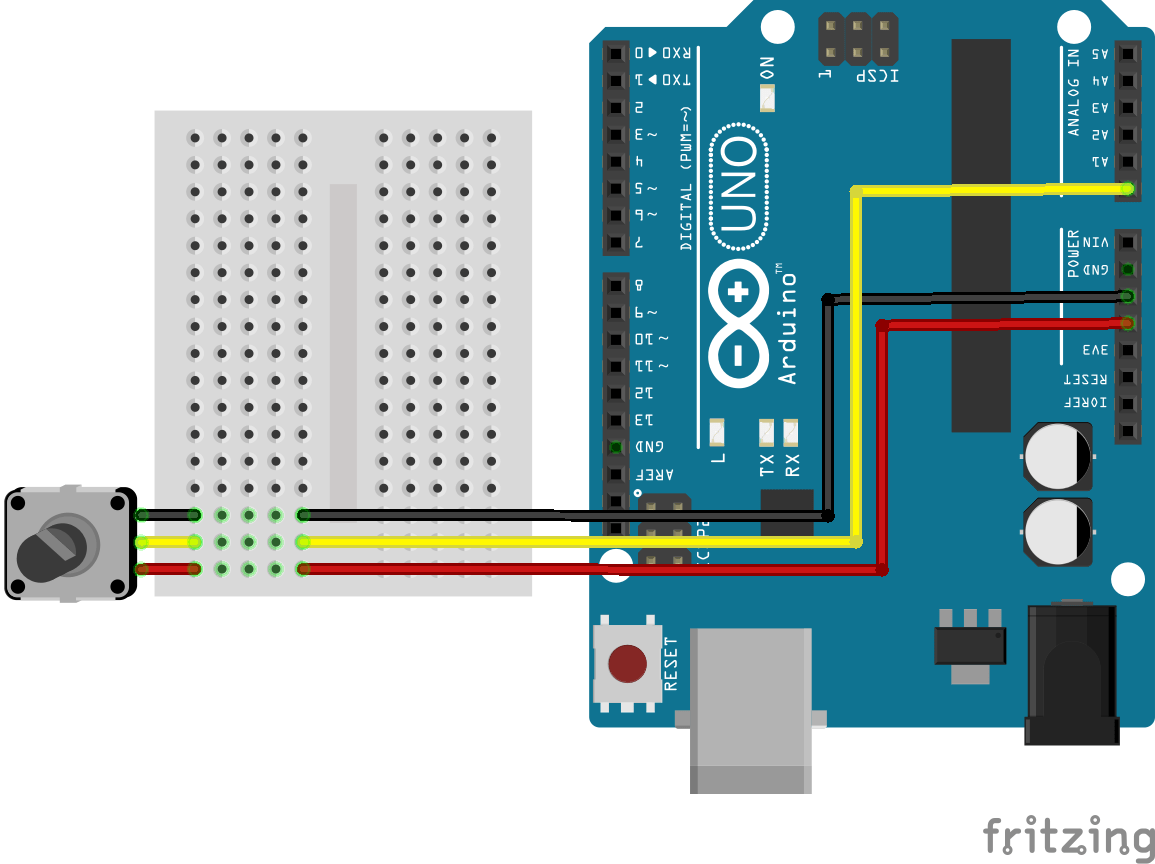
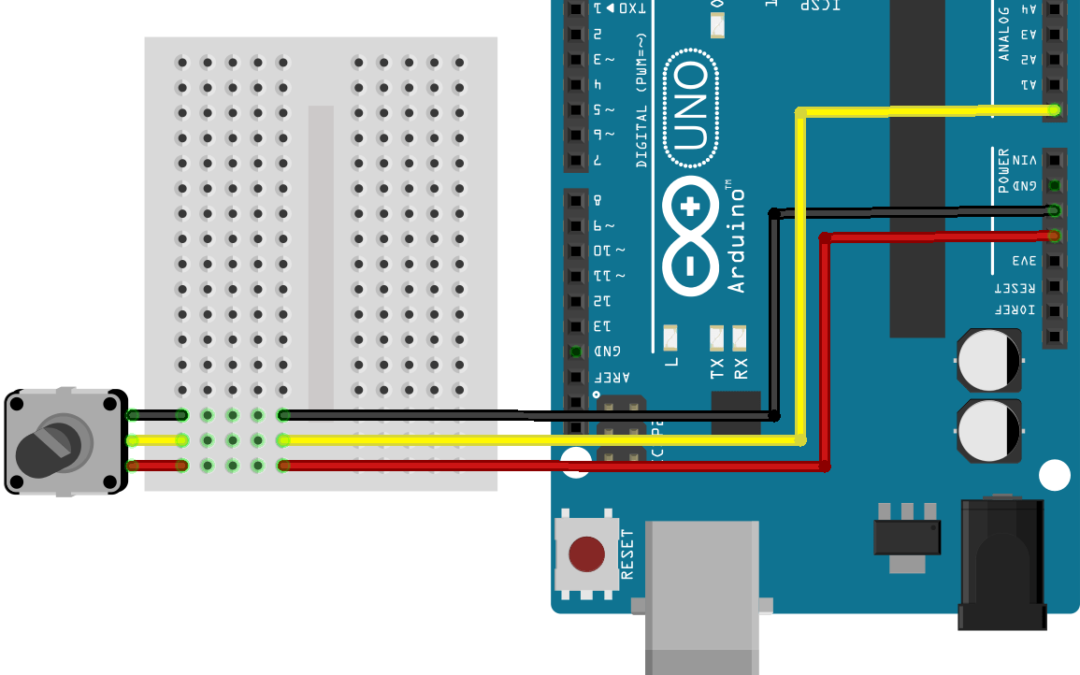
The potentiometer is a passive component. To measure a change in resistance, we send a current between the potentiometer terminals extreme and we can read the value of the resulting voltage divider created on the middle terminal.The potentiometer must be connected as shown below.

Code
To display the physical value of the sensor, it is necessary to know the conversion rule is often linear type y = a * x + b. In order to have a clean and readable code, it is best to place the code in a sub function. We will create a function that is responsible for reading the sensor value and convert physical value.To use the potentiometer object we use the following code:
//Constants
#define NB_POT 1

//Parameters
const int potPin  = A0;

//Variables
int potVal  = 0;

void setup(){
//Init Serial USB
Serial.begin(9600);
Serial.println(F("Initialize System"));
//Init potentiometer
 pinMode(potPin,INPUT);
}

void loop(){
readPot();
}

void readPot(){/* function readPot */
////Read Potentiometer value
potVal=analogRead(potPin);
Serial.print("Raw val : ");Serial.println(potVal);
Serial.print("Phys val : ");Serial.println(potRawToPhys(potVal));
delay(200);
                        }

float potRawToPhys(int raw){/* function potRawToPhys */
////Potentiometer conversion rule
float Vout = float(raw) * (5/float(1024));//Conversion analog to voltage
float phys = (R * (5 - Vout))/5;//Conversion voltage to resistance

 return phys;
}
Applications
- Control the brightness of an LED.
Sources
Find other examples and tutorials in our Automatic code generator
Code Architect


