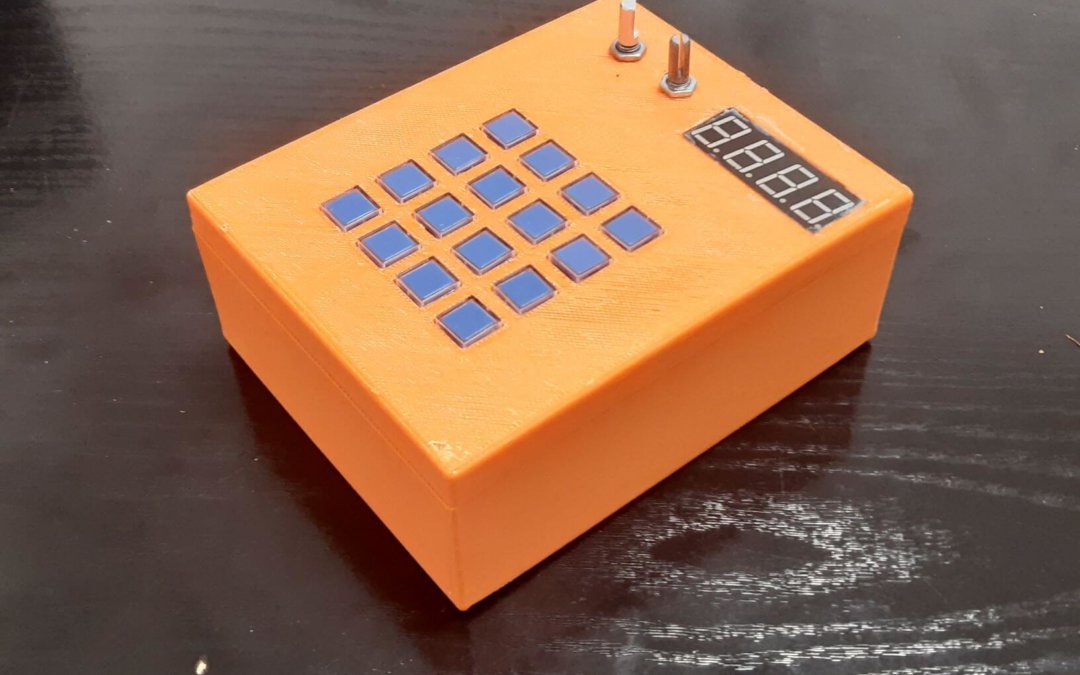
Neste projeto, vamos construir uma caixa MIDI para podermos testar os instrumentos sintetizadores CoolSoft e tocar algumas notas. Vamos utilizar três sensores para modificar as mensagens MIDI. É livre de acrescentar elementos para criar um controlador MIDI mais completo.
Pré-requisitos: criar uma interface MIDI com o Arduino
Equipamento
- Arduino UNO
- potenciómetro
- codificador rotativo
- teclado analógico 4×4
Características
Para testar a comunicação MIDI e o sintetizador. Vamos definir algumas funções simples:
- Utilizando o teclado, vamos enviar notas musicais
- Le potenciómetro permet d’ajuster la vitesse de la note
- E o codificador modificará o instrumento sintetizado
N.B.: Escolhemos um teclado analógico para este projeto porque é fácil de ligar para podermos testar rapidamente o sintetizador. A desvantagem é que só se pode premir uma tecla de cada vez. Para um controlador MIDI mais eficaz, podes optar por um teclado digital ou por botões de arcada que te dêem feedback sobre as notas tocadas.
Diagrama
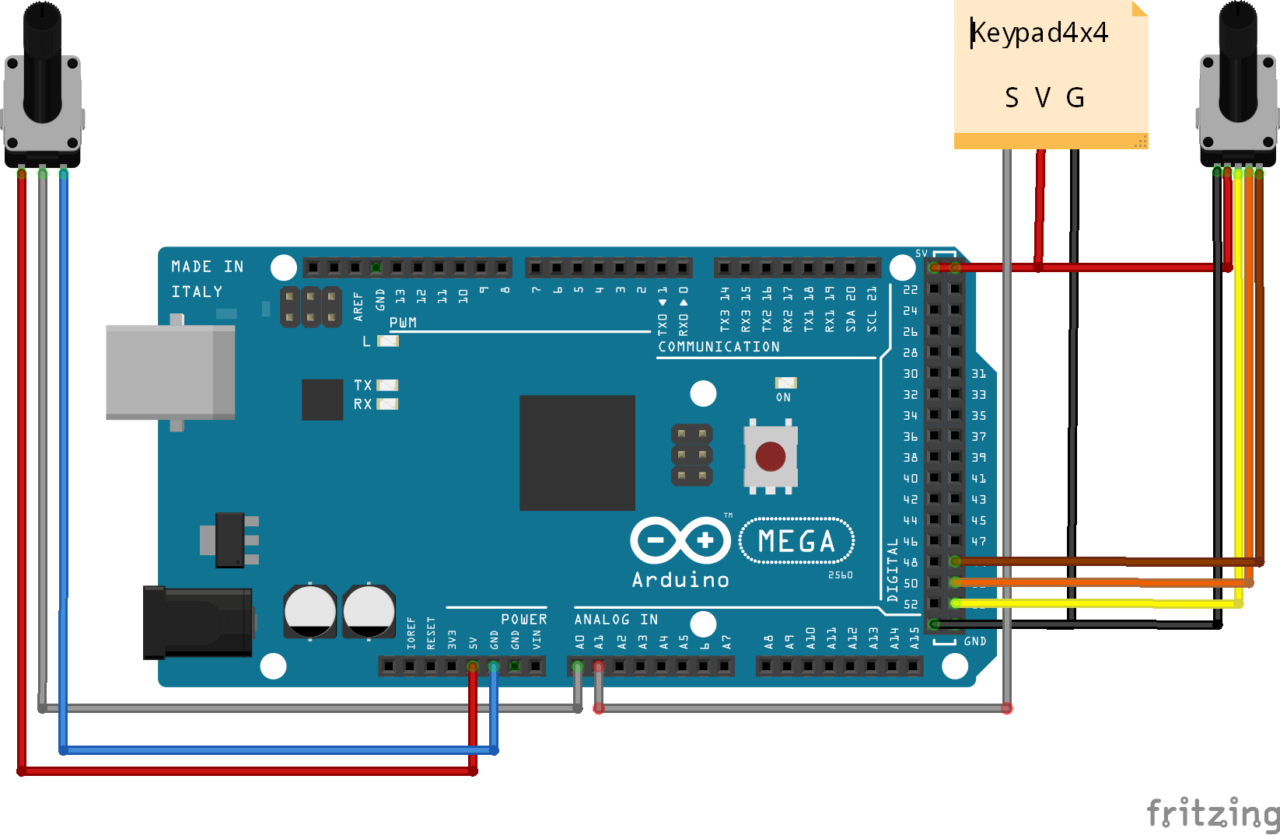
N.B.: Para facilitar a leitura, retirámos o ecrã de 7 segmentos. Pode encontrar a ligação neste tutorial.
Descrição do código
Em primeiro lugar, vamos definir funções para gerir cada um dos sensores.
Para o teclado 4×4, atribuímos a cada tecla um identificador que corresponde a uma nota. Criamos uma função que devolve o identificador quando uma tecla é premida.
const int valThresh[nbABtn] = {1000, 900, 820, 750, 660, 620, 585, 540, 500, 475, 455, 425, 370, 300, 260, 200};
const int pitches[nbABtn] = {50, 52, 54, 56, 58, 60, 62, 64, 66, 68, 70, 72, 74, 76, 78, 80 }
int getABtn() { /* function getABtn */
 //// Read button states from keypad
 int val = analogRead(abtnPin);
 if (val <= 200) {
   return 0;
 } else {
   for (int i = 0; i < 16; i++) {
     if (val > valThresh[i]) {
       delay(100);
       return i + 1;
     }
   }
 }
}
Definimos uma função readPot que modificará o valor da velocidade em função do valor do potenciómetro velVal.
void readPot(){
  velVal = map(int(analogRead(potPin) / 10) * 10, 0, 1023, 0, 127);
  if (oldVel != velVal) {
    //Serial.println(velVal);
    velocity = velVal;
  }
  oldVel = velVal;
}
A função que gere o codificador permite-nos modificar o instrumento musical (identificador rotVal entre 0 e 127).
void readRotary( ) { /* function readRotary */
  ////Test routine for Rotary
  // gestion position
  clkState = digitalRead(clkPin);
  if ((clkLast == LOW) && (clkState == HIGH)) {//rotary moving
    if (digitalRead(dtPin) == HIGH) {
      rotVal = rotVal - 1;
      if ( rotVal < 0 ) {
        rotVal = 0;
      }
    }
    else {
      rotVal++;
      if ( rotVal > 127 ) {
        rotVal = 127;
      }
    }
    MIDImessage(prgmChg, rotVal, 0);
    number = rotVal;
    for (int i = 0; i < NUM_OF_DIGITS; i++)
    {
      digit_data[i] = number % 10;
      number /= 10;
    }
    delay(200);

  }
  clkLast = clkState;

  //gestion bouton
  swState = digitalRead(swPin);
  if (swState == LOW && swLast == HIGH) {
    delay(100);//debounce
  }
  swLast = swState;
}
Uma vez tida em conta a modificação do instrumento, o seu valor é visualizado no módulo 7 Segmento.
void Display(int id, unsigned char num)
{
  digitalWrite(latch, LOW);
  shiftOut(data, cs, MSBFIRST, table[num]);
  digitalWrite(latch, HIGH);
  for (int j = 0; j < NUM_OF_DIGITS; j++) digitalWrite(dPins[j], LOW);
  digitalWrite(dPins[id], HIGH);
}

void updateDigits() {
  for (int j = 0; j < NUM_OF_DIGITS; j++){
    Display(j, digit_data[j]);
    delay(2);
  }
}
Finalmente, voltamos à função que nos permite enviar mensagens MIDI
void MIDImessage(byte command, byte MIDInote, byte MIDIvelocity) {
  Serial.write(command);//send note on or note off command
  Serial.write(MIDInote);//send pitch data
  if (command == noteON || command == noteOFF) {
    Serial.write(MIDIvelocity);//send velocity data
  }
}
Tudo o que falta é enviar a mensagem quando um botão é premido
void readAbtn() { /* function readAbtn */
  //// Read button states from keypad
  btnId = getABtn();
  if (btnId) {
    if (lastBtnId != btnId) {
      MIDImessage(noteOFF, pitches[lastBtnId - 1], velocity);
    }
    MIDImessage(noteON, pitches[btnId - 1], velocity); //turn note on
    lastBtnId = btnId;
  }
}
Código completo da MIDIbox
byte velocity = 50;//velocity of MIDI notes, must be between 0 and 127
byte noteON = 144;// = 10010000 , Note On
byte noteOFF = 128;// = 10000000 , Note Off
byte pitchBend = 224; // = 11100000, Pitch Bender Change
byte polyKey = 160; // = 10100000, Polyphonic Key Pressure
byte overallPr = 208; // = 11010000, Overall Pressure
byte prgmChg = 192; // = 11000000, Program Change
byte ctrlChg = 176; // = 10110000,  Control Change

//Keypad
#define nbABtn 16
const int abtnPin = A1;
const int valThresh[nbABtn] = {1000, 900, 820, 750, 660, 620, 585, 540, 500, 475, 455, 425, 370, 300, 260, 200};
const int pitches[nbABtn] = {50, 52, 54, 56, 58, 60, 62, 64, 66, 68, 70, 72, 74, 76, 78, 80 };
bool btnPressed = false;

//Potentiometer
const int potPin = A0; // Pin connected to sensor
int velVal = 0, oldVel = 0; // Analog value from the sensor

//rotary var
const int clkPin  = 53;
const int dtPin  = 51;
const int swPin  = 49;
int rotVal  = 0, btnId = 0, lastBtnId = 0;
bool clkState  = LOW;
bool clkLast  = HIGH;
bool swState  = HIGH;
bool swLast  = HIGH;

//4x7Segment
#define NUM_OF_DIGITS 4
int latch = 4; //74HC595  pin 9 STCP
int cs = 5; //74HC595  pin 10 SHCP
int data = 3; //74HC595  pin 8 DS
int dPins[4] = {8, 9, 10, 11};
//  DP G F E D C B A
//0: 1 1 0 0 0 0 0 0 0xc0
//1: 1 1 1 1 1 0 0 1 0xf9
//2: 1 0 1 0 0 1 0 0 0xa4
//3: 1 0 1 1 0 0 0 0 0xb0
//4: 1 0 0 1 1 0 0 1 0x99
//5: 1 0 0 1 0 0 1 0 0x92
//6: 1 0 0 0 0 0 1 0 0x82
//7: 1 1 1 1 1 0 0 0 0xf8
//8: 1 0 0 0 0 0 0 0 0x80
//9: 1 0 0 1 0 0 0 0 0x90
unsigned char table[] =
{0xc0, 0xf9, 0xa4, 0xb0, 0x99, 0x92, 0x82, 0xf8, 0x80, 0x90};
int digit_data[NUM_OF_DIGITS] = {0};
unsigned int number = 0;
unsigned long previousUpdate = 0, updateTime = 200;

void setup() {
  Serial.begin(115200);
  pinMode(potPin, INPUT);

  pinMode(clkPin, INPUT);
  pinMode(dtPin, INPUT);
  pinMode(swPin, INPUT_PULLUP);

  pinMode(latch, OUTPUT);
  pinMode(cs, OUTPUT);
  pinMode(data, OUTPUT);
  for (int j = 0; j < NUM_OF_DIGITS; j++) pinMode(dPins[j], OUTPUT);
}

void loop() {
  readRotary();
  updateDigits();
  readAbtn();
  readPot();
}

void MIDImessage(byte command, byte MIDInote, byte MIDIvelocity) {
  Serial.write(command);//send note on or note off command
  Serial.write(MIDInote);//send pitch data
  if (command == noteON || command == noteOFF) {
    Serial.write(MIDIvelocity);//send velocity data
  }
}


void readAbtn() { /* function readAbtn */
  //// Read button states from keypad
  btnId = getABtn();
  if (btnId) {
    if (lastBtnId != btnId) {
      MIDImessage(noteOFF, pitches[lastBtnId - 1], velocity);
    }
    MIDImessage(noteON, pitches[btnId - 1], velocity); //turn note on
    lastBtnId = btnId;
  }
}

int getABtn() { /* function getABtn */
  //// Read button states from keypad
  int val = analogRead(abtnPin);
  if (val <= 200) {
    return 0;
  } else {
    for (int i = 0; i < 16; i++) {
      if (val > valThresh[i]) {
        delay(100);
        return i + 1;
      }
    }
  }
}

//Potentiometer
void readPot(){
  velVal = map(int(analogRead(potPin) / 10) * 10, 0, 1023, 0, 127);
  if (oldVel != velVal) {
    //Serial.println(velVal);
    velocity = velVal;
  }
  oldVel = velVal;
}

//7Segment
void Display(int id, unsigned char num)
{
  digitalWrite(latch, LOW);
  shiftOut(data, cs, MSBFIRST, table[num]);
  digitalWrite(latch, HIGH);
  for (int j = 0; j < NUM_OF_DIGITS; j++) digitalWrite(dPins[j], LOW);
  digitalWrite(dPins[id], HIGH);
}

void updateDigits() {
  for (int j = 0; j < NUM_OF_DIGITS; j++)
  {
    Display(j, digit_data[j]);
    delay(2);
  }
}

//rotary
void readRotary( ) { /* function readRotary */
  ////Test routine for Rotary
  // gestion position
  clkState = digitalRead(clkPin);
  if ((clkLast == LOW) && (clkState == HIGH)) {//rotary moving
    if (digitalRead(dtPin) == HIGH) {
      rotVal = rotVal - 1;
      if ( rotVal < 0 ) {
        rotVal = 0;
      }
    }
    else {
      rotVal++;
      if ( rotVal > 127 ) {
        rotVal = 127;
      }
    }
    MIDImessage(prgmChg, rotVal, 0);
    number = rotVal;
    for (int i = 0; i < NUM_OF_DIGITS; i++)
    {
      digit_data[i] = number % 10;
      number /= 10;
    }
    delay(200);

  }
  clkLast = clkState;

  //gestion bouton
  swState = digitalRead(swPin);
  if (swState == LOW && swLast == HIGH) {
    delay(100);//debounce
  }
  swLast = swState;
}
Resultados
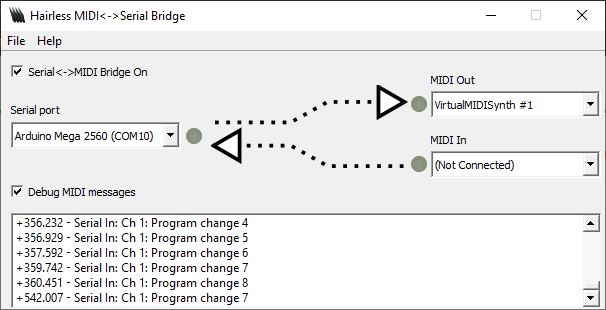
Para testar o código, é necessário abrir os programas hairless e VirtualMIDISynth como descrito neste artigo.
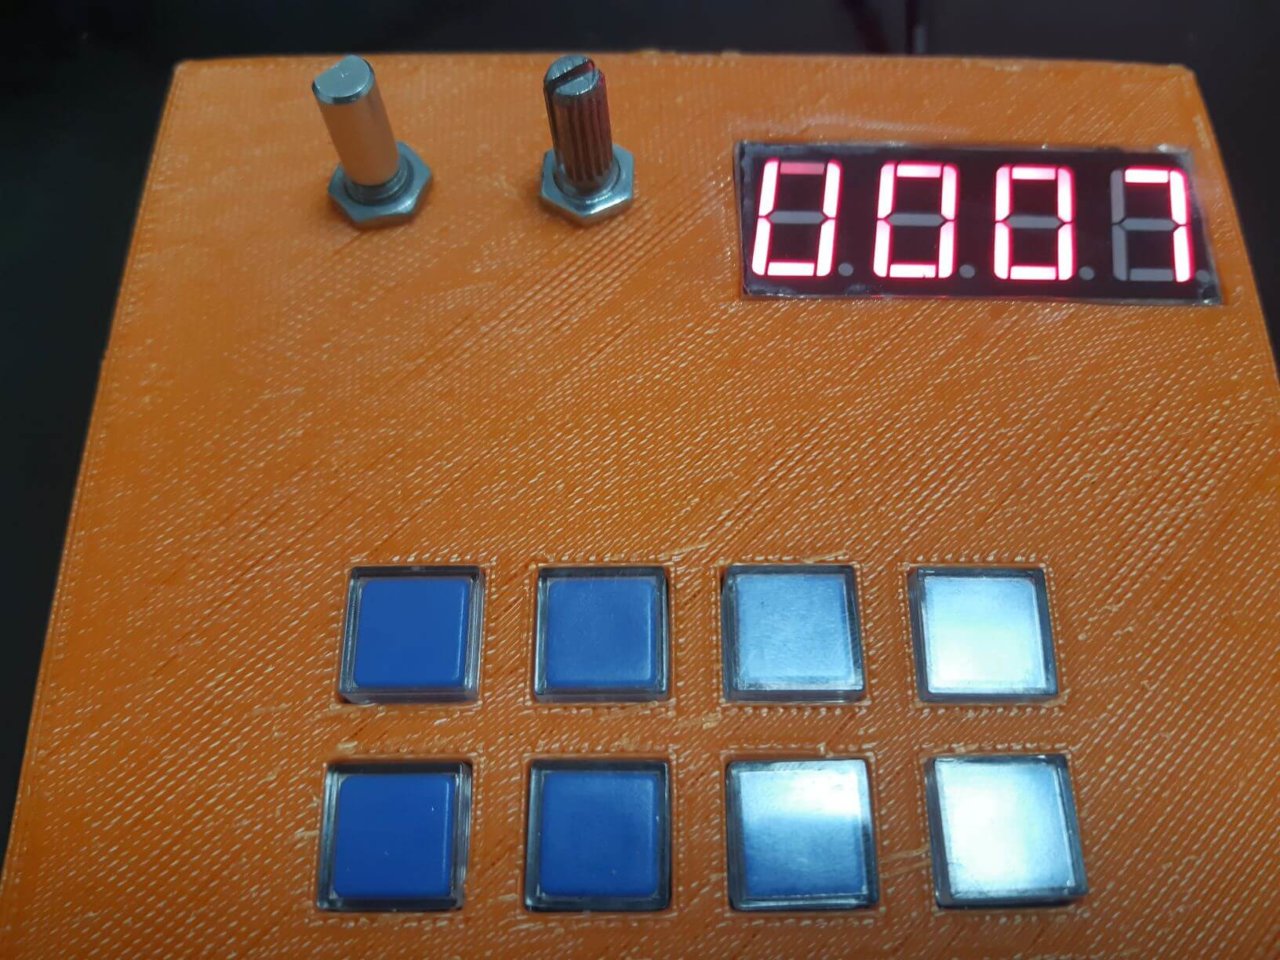
Se tudo estiver corretamente configurado, deverá ouvir sons provenientes do computador quando premir as teclas do teclado.
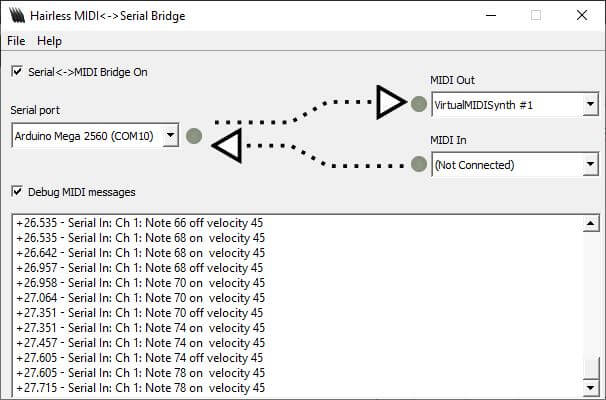
Também pode alterar a velocidade da nota tocando no potenciómetro.
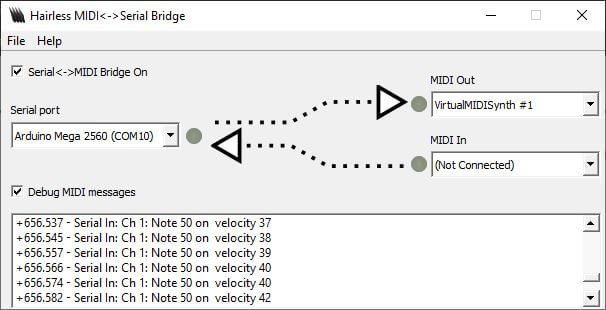
Entre duas notas tocadas, pode então selecionar outro instrumento sintetizador utilizando o codificador rotativo.
Próximas etapas
- Utilização de LEDs ou botões iluminados
- Gestão da entrada MIDI para acender os LEDs
- Utilização de um ecrã OLED para um menu mais completo
