Once you’ve got your CNC running with LaserGRBL on Windows, you may want to run it on a Linux computer. In this tutorial, we’ll show you how to install LaserGRBL on a Linux PC.
N.B.: To create the Gcode from the image file, you still need to do this on a Windows PC. The Raster image importer doesn’t seem to work under Ubuntu. It is still possible to dedicate a Linux computer for burning.
Hardware
- A Linux computer connected to the Internet
- Arduino UNO with CNC Shield (or other)
Installing Wine under Linux
This tutorial is based on Ubuntu 20.04 and Linux mint 21.
Installing wine:i386 Ubuntu
sudo dpkg --add-architecture i386
wget -qO - https://dl.winehq.org/wine-builds/winehq.key | sudo apt-key add -
sudo apt-add-repository 'deb https://dl.winehq.org/wine-builds/ubuntu/ disco main'
sudo apt-get update
sudo apt install --install-recommends winehq-stable
Installation wine:i386 Mint
sudo dpkg --add-architecture i386
sudo mkdir -pm755 /etc/apt/keyrings
sudo wget -O /etc/apt/keyrings/winehq-archive.key https://dl.winehq.org/wine-builds/winehq.key
sudo wget -nc -P /etc/apt/sources.list.d/ https://dl.winehq.org/wine-builds/ubuntu/dists/jammy/winehq-jammy.sources
sudo apt update
sudo apt install --install-recommends winehq-staging
Wine installation on Raspberry Pi (Pi-Apps)
wget -qO - https://raw.githubusercontent.com/Botspot/pi-apps/master/install | bashYou can then install Wine by searching for the application on Pi-Apps.
WARNING: At the time of writing this tutorial, it is not possible to use LaserGRBL on Raspberry Pi. I’ll leave the wine installation for future reference.
Installer wine-mono (si nécessaire)
sudo apt install mono-completeN.B.: Run “wine clock” in the terminal, Wine should launch the missing installations such as wine-mono and Gecko.
Installing LaserGRBL with Wine
Download the installation file from the LaserGRBL website
To install and run LaserGRBL under Linux, enter the following command
wine /Downloads/install.exe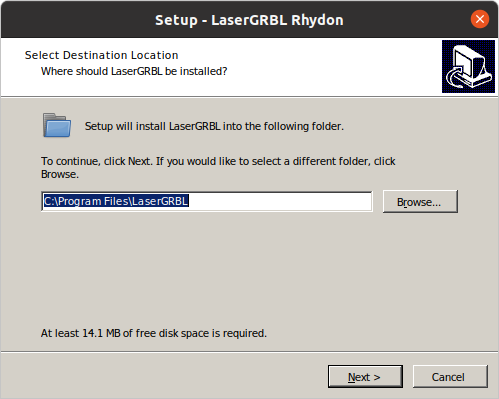
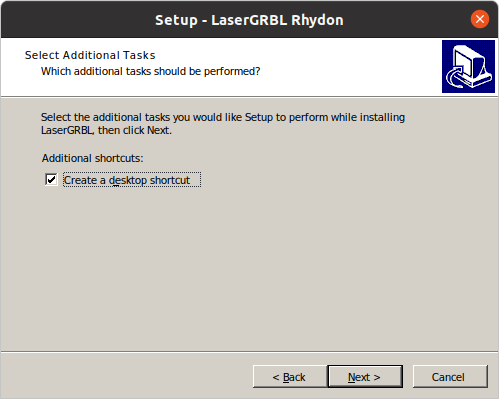
during installation, select “create a shortcut”.
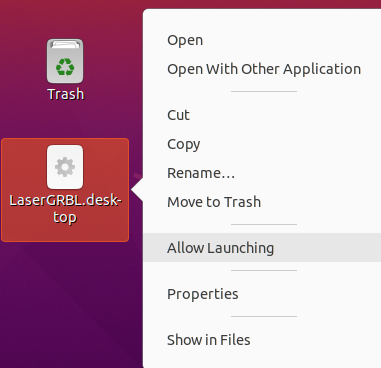
A .desktop should appear on the desktop. Right-click on the file and select “Allow launching”.

Create a virtual link between COM ports and dev ports
To enable LaserGRBL and the Arduino to communicate between the Windows and Linux worlds, we’re going to create a link between the virtual port COM10 and the physical port ttyACM0.
You can find the USB port to which the Arduino is connected with the following commands
lsusb
dmesg | grep tty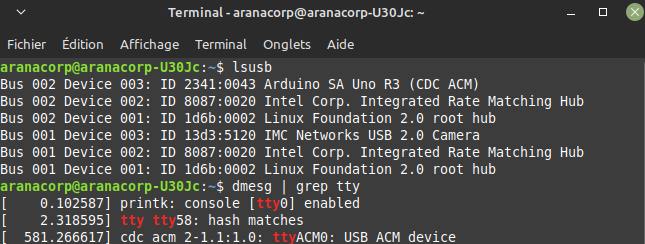
In our case, the Arduino is connected to the ttyACM0 port, which we will link to the COM10 virtual port.
cd ~/.wine/dosdevices/
ln -s /dev/ttyACM0 com10
N.B.: if the com10 file already exists, you can delete it with the rm com10 command.
Installing Arduino under Linux
You can also install Arduino to load the LaserGRBL firmware onto the Arduino from this computer.
sudo snap install arduino
ou
sudo apt-get install arduino
You can now use LaserGRBL under linux and have a dedicated post for your CNC.
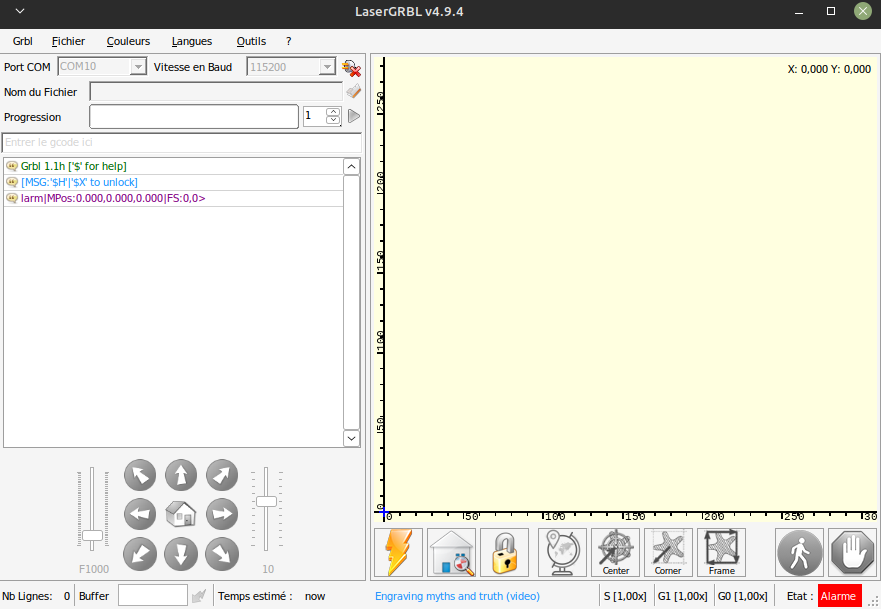
To complete your installation
For simplicity’s sake, as Raster is not available on Linux, you can:
- Créer un dossier partagé avec Samba pour transférer facilement vos fichiers NC
- Installer NoMachine sur votre machine dédiée pour lancer directement votre gravure depuis votre PC
Troubleshooting
- COM port not found
When I restart LaserGRBL under Linux, it can’t connect to the COM port. To correct this problem, I delete and recreate the link between tty port (linux) and COM port (windows).
cd ~/.wine/dosdevices
rm com10
ln -s /dev/ttyACM0 com10
N.B: You can put these few lines in a bash file to run it when LaserGRBL starts up
- .NET not installed
When you launch LaserGRBL, the message install .NET v4.0 appears. You can install .NET with winetricks
sudo apt-get install winetricks
winetricks dotnet40
Other software
There are other Linux-compatible software packages for controlling CNC machines
- LinuxCNC : installation à partir de paquet DEB ou repository
- BCNC

If you use other Linux-compatible software, don’t hesitate to add the name and a link in the comments.


