Una de las aplicaciones de los sensores capacitivos es la creación de un interruptor táctil para encender una lámpara, por ejemplo. En este proyecto vamos a diseñar un sensor capacitivo con Arduino que utilizaremos como interruptor táctil para encender y apagar una lámpara.
Hardware
- Arduino Nano
- Resistencia de 10M Ohm
- Relé
- cable eléctrico o material conductor
- Convertidor de CA
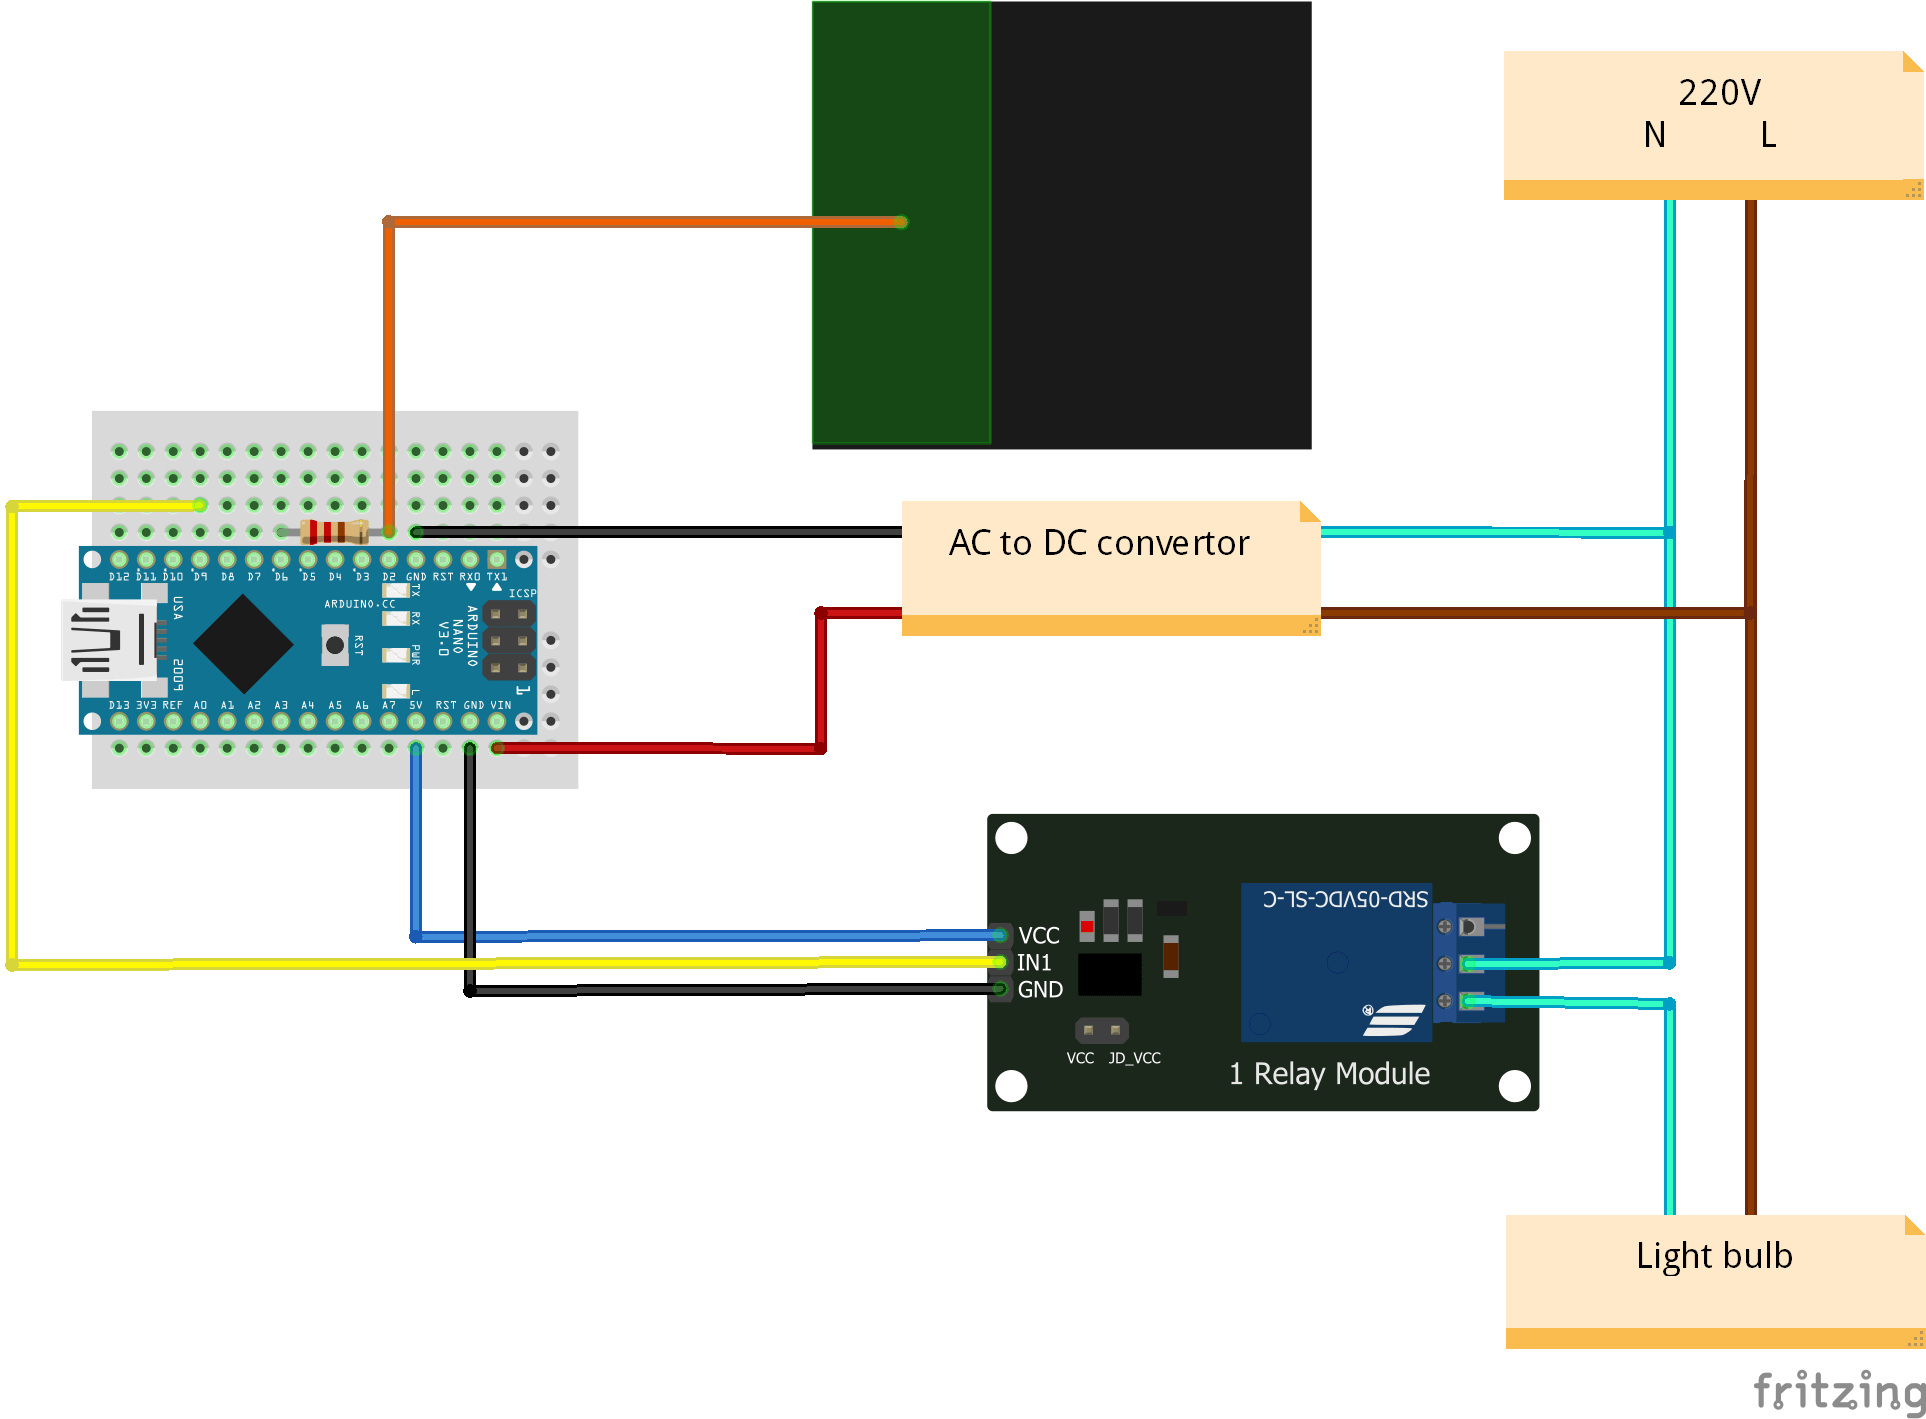
Esquema eléctrico

Atención: este proyecto utiliza 220V. Tome las precauciones necesarias para evitar electrocuciones.
Código
Para crear un sensor capacitivo, utilizamos la librería CapacitiveSensor. Cuando el sensor capacitivo cambia de estado, modificamos el estado enviado al relé para abrir o cerrar el circuito.
#include <CapacitiveSensor.h>
#define DEBUG 0

//Capacitive sensor
CapacitiveSensor   cs_6_2 = CapacitiveSensor(6, 2);       // 10M resistor between pins 6 & 2, pin 2 is sensor pin, add a wire and or foil if desired
const int sensitivity  = 50;
long val;

//Light
const int lightPin = 9;
bool lightState = false;
bool btnState = false, oldState = false;

//smooth
long smoothval, total;
const int numReadings  = 3;
long readings[numReadings] = {0};
int readIndex;

long threshVal=500;

void setup()
{
  pinMode(lightPin, OUTPUT);
  cs_6_2.set_CS_AutocaL_Millis(0xFFFFFFFF);     // turn off autocalibrate on channel 1 - just as an example
  Serial.begin(9600);
  Serial.println("Touchless lamp initialized");
  delay(2000);

  for (int i = 0; i < numReadings; i++) {
    val =  cs_6_2.capacitiveSensor(sensitivity);// increase for hi
    smoothval = smooth(val);
  }
}

void loop()
{
  val =  cs_6_2.capacitiveSensor(sensitivity);// increase for hi
  smoothval = smooth(val);

  if (DEBUG) {
    //Serial.print(millis() - timeStart);        // check on performance in milliseconds
    Serial.print("\t");                    // tab character for debug window spacing
    Serial.print(val);                  // print sensor output 1
    Serial.print("\t");
    Serial.print(smoothval);                  // print sensor smooth output
    Serial.println();                  // print sensor smooth output
  }

  // condition
  if (btnState == false && smoothval > threshVal) {
    btnState = true;
  }
  if (btnState == true && smoothval <= threshVal*0.8) {
    btnState = false;
  }

  if (oldState != btnState) {
    if (oldState == false) {
      lightState = !lightState;
    }
    digitalWrite(lightPin, lightState);
    delay(200);
  }
  oldState = btnState;

  delay(100);         // arbitrary delay to limit data to serial port
}

long smooth(long val) { /* function smooth */
  ////Write data on device

  long average;
  // subtract the last reading:
  total = total - readings[readIndex];
  // read from the sensor:
  readings[readIndex] = val;//cs.capacitiveSensor(sensitivity);
  // add the reading to the total:
  total = total + readings[readIndex];
  // advance to the next position in the array:
  readIndex = readIndex + 1;

  // if we're at the end of the array...
  if (readIndex >= numReadings) {
    // ...wrap around to the beginning:
    readIndex = 0;
  }

  // calculate the average:
  average = total / numReadings;
  // send it to the computer as ASCII digits

  return average;
}
Resultados
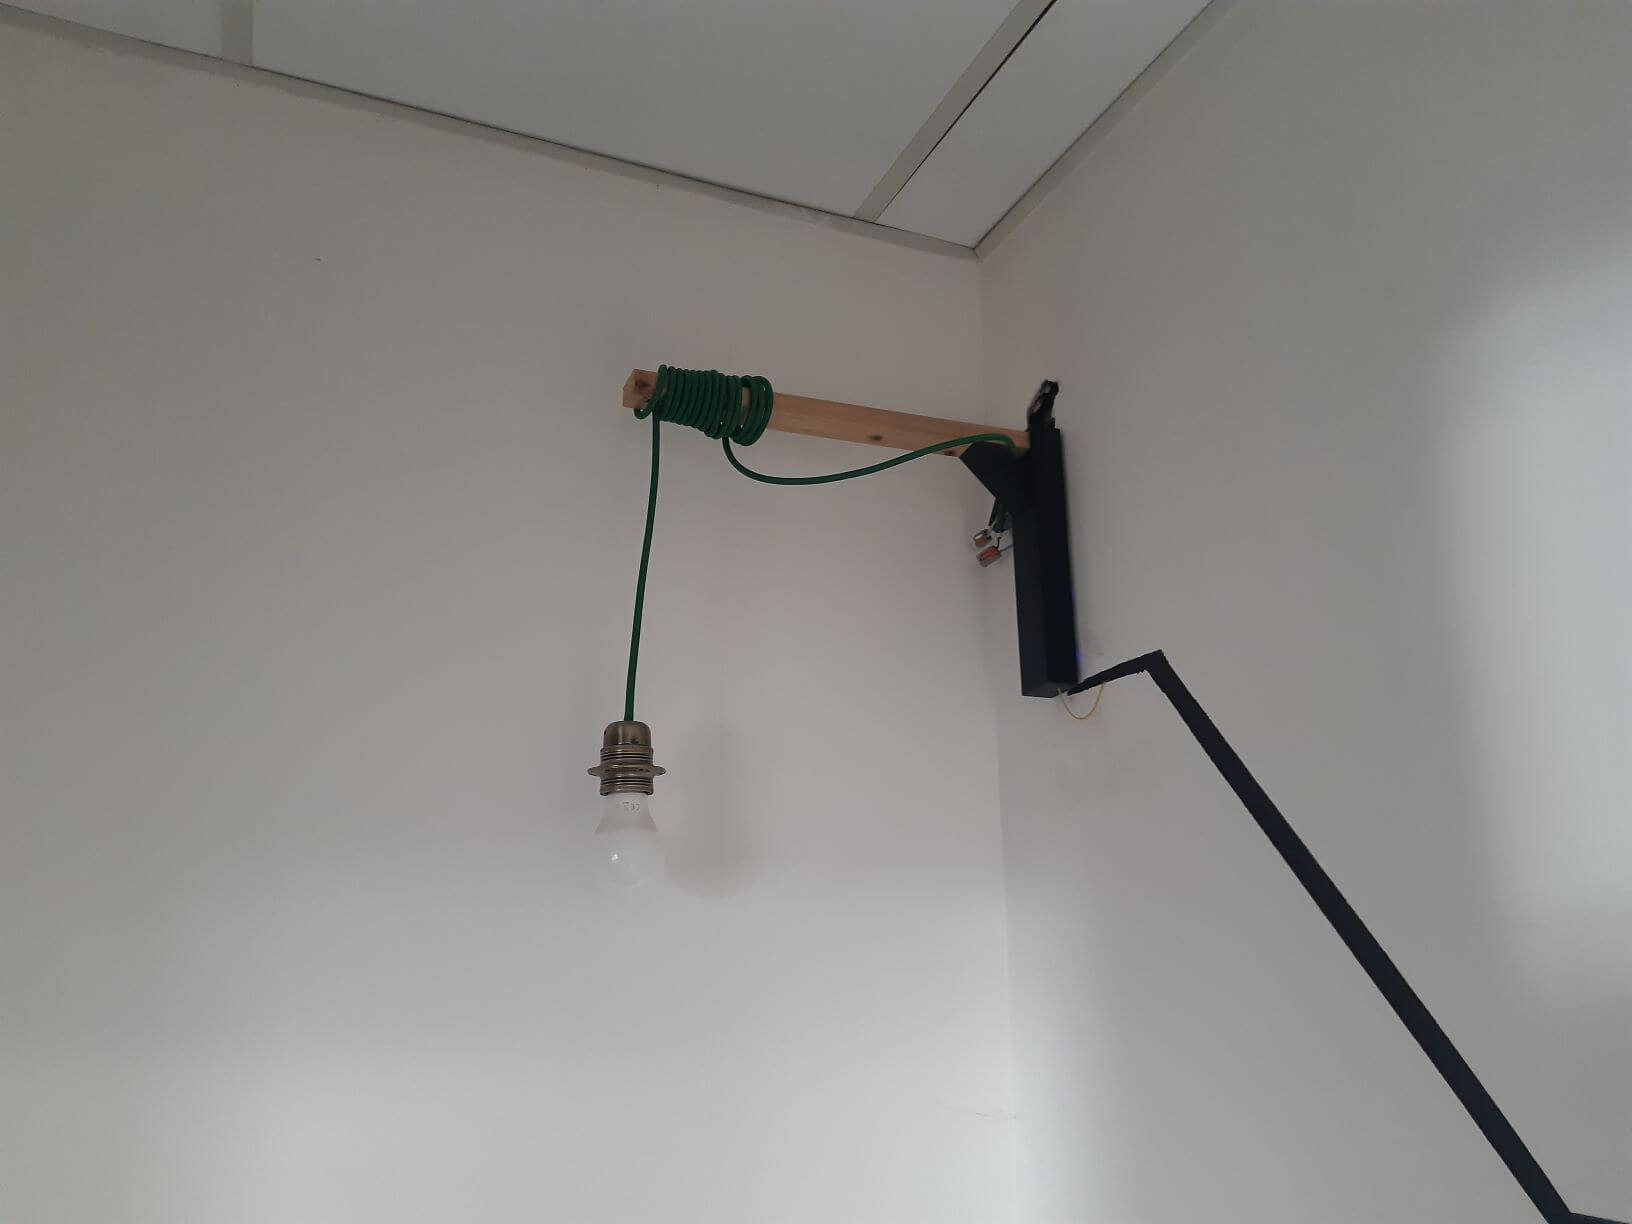
Al acercar la mano al cable que actúa como interruptor táctil, la lámpara debe encenderse o apagarse. De ti depende ajustar la sensibilidad del sensor, la resistencia y el valor umbral (umbralVal) para obtener el comportamiento deseado.
Próximos pasos
- Mejorar la robustez del sensor capacitivo frente a perturbaciones externas
- Añadir una función para apagar la lámpara automáticamente después de un cierto período de tiempo


