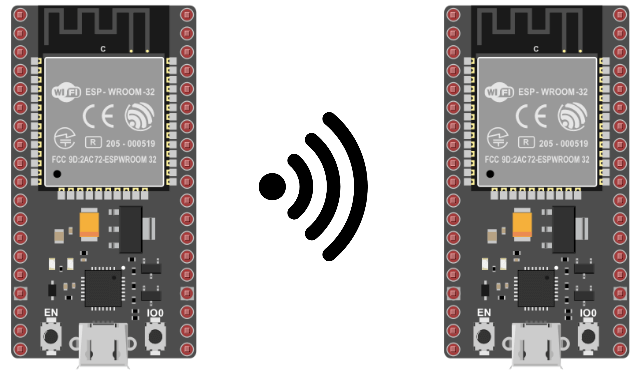
El NodeMCU ESP32 es un pequeño microcontrolador con un chip WiFi. Es posible establecer comunicación entre dos ESP32 cuando están conectados a la misma red. En este tutorial, veremos una arquitectura maestra.
Hardware
- Ordenador
- NodeMCU ESP32 x2 o más
- Cable USB A macho
Configurar el servidor con una dirección IP fija
En algunos casos, como la creación de un servidor, necesitará especificar una dirección IP concreta para su microcontrolador. Es posible definir una dirección fija en los ESP32 especificando las direcciones IP de la puerta de enlace y de la subred.
En la línea de comandos, escriba arp -a para mostrar las direcciones IP que ya están en uso en su red. Elija una dirección que no esté en la lista (por ejemplo, 192.168.1.103).
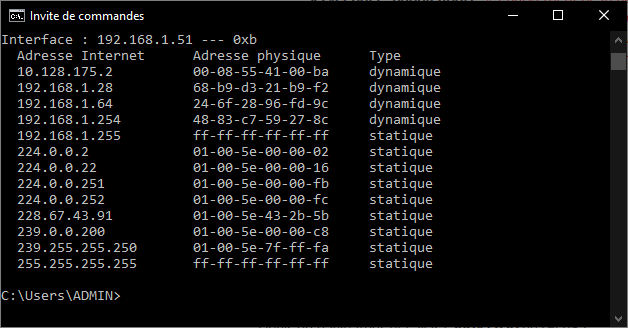
A continuación, escriba ipconfig para recuperar las direcciones IP correspondientes a su router.
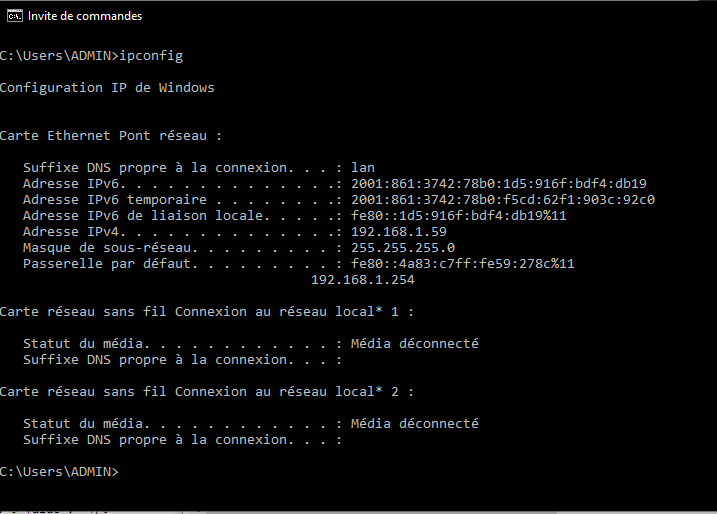
Inicialice las distintas direcciones IP en el código Arduino (no olvide sustituir estas direcciones por las que aparecen en su ordenador).
IPAddress ip(192, 168, 1,103 );
IPAddress gateway(192, 168, 1, 254);
IPAddress subnet(255, 255, 255, 0);
A continuación, puede configurar la conexión Wi-Fi antes de inicializarla
WiFi.config(ip, gateway, subnet); // Static IP setup
WiFi.begin(ssid, password);
ESP32 Código Maestro
Para el microcontrolador maestro, vamos a crear un servidor para gestionar las peticiones del navegador, la interfaz web y las peticiones de los microcontroladores esclavos. Vamos a utilizar la librería WiFi.h, que gestiona el chip WiFi de las tarjetas ESP32.
N.B.: No olvides cambiar los valores de ssid y password por el nombre y password de la red wifi que quieras utilizar.
//Libraries
#include <WiFi.h>

//Constants
#define NUM_SLAVES 1
#define LED 2

//Parameters
String nom = "Master";
const char* ssid = "*******";
const char* password = "**********";

//Variables
bool sendCmd = false;
String slaveCmd = "0";
String slaveState = "0";

//Objects
WiFiServer server(80);
WiFiClient browser;
IPAddress ip(192, 168, 1, 44);
IPAddress gateway(192, 168, 1, 254);
IPAddress subnet(255, 255, 255, 0);

void setup() {
  //Init Serial USB
  Serial.begin(115200);
  Serial.println(F("Initialize System"));
  //Init ESP32 Wifi
  WiFi.config(ip, gateway, subnet);       // forces to use the fix IP
  WiFi.begin(ssid, password);
  while (WiFi.status() != WL_CONNECTED) {
    delay(500);
    Serial.print(F("."));
  }
  server.begin();
  Serial.print(nom);
  Serial.print(F(" connected to Wifi! IP address : http://")); Serial.println(WiFi.localIP()); // Print the IP address
  pinMode(LED, OUTPUT);
}

void loop() {
  clientRequest();
}

void clientRequest( ) { /* function clientRequest */
  ////Check if client connected
  WiFiClient client = server.available();
  client.setTimeout(50);
  if (client) {
    if (client.connected()) {
      //Print client IP address
      Serial.print(" ->");Serial.println(client.remoteIP());
      String request = client.readStringUntil('\r'); //receives the message from the client

      if (request.indexOf("Slave0") == 0) {
        //Handle slave request
        Serial.print("From "); Serial.println(request);
        int index = request.indexOf(":");
        String slaveid = request.substring(0, index);
        slaveState = request.substring(request.indexOf("x") + 1, request.length());
        Serial.print("state received: "); Serial.println(slaveState);
        client.print(nom);
        if (sendCmd) {
          sendCmd = false;
          client.println(": Ok " + slaveid + "! Set state to x" + String(slaveCmd) + "\r");
        } else {
          client.println(": Hi " + slaveid + "!\r"); // sends the answer to the client
        }
        client.stop();                // terminates the connection with the client
      } else {
        Serial.print("From Browser : "); Serial.println(request);

        handleRequest(request);
        webpage(client);
      }
    }
  }
}

void handleRequest(String request) { /* function handleRequest */
  ////Check if client connected
  if (request.indexOf("/light1on") > 0)  {
    digitalWrite(LED, LOW);
  }
  if (request.indexOf("/light1off") > 0)  {
    digitalWrite(LED, HIGH);
  }
  if (request.indexOf("/light2on") > 0)  {
    sendCmd = true;
    slaveCmd = "1";
  }
  if (request.indexOf("/light2off") > 0)  {
    sendCmd = true;
    slaveCmd = "0";
  }
}

void webpage(WiFiClient browser) { /* function webpage */
  ////Send webpage to browser
  browser.println("HTTP/1.1 200 OK");
  browser.println("Content-Type: text/html");
  browser.println(""); //  do not forget this one
  browser.println("<!DOCTYPE HTML>");
  browser.println("<html>");
  browser.println("<head>");
  browser.println("<meta name='apple-mobile-web-app-capable' content='yes' />");
  browser.println("<meta name='apple-mobile-web-app-status-bar-style' content='black-translucent' />");
  browser.println("</head>");
  browser.println("<body style = ' background-color:#000000; color:white;'>");
  browser.println("<hr/><hr>");
  browser.println("<h1><center> Esp32 Electrical Device Control </center></h1>");
  browser.println("<hr/><hr>");
  browser.println("<br><br>");
  browser.println("<br><br>");
  browser.println("<h2> Commands </h2>");
  browser.println("<center>");
  browser.println("Built-in LED");
  browser.println("<a href='/light1on'><button>Turn On </button></a>");
  browser.println("<a href='/light1off'><button>Turn Off </button></a><br />");
  browser.println("</center>");
  browser.println("<br><br>");
  browser.println("<center>");
  browser.println("Device 2");
  browser.println("<a href='/light2on'><button>Turn On </button></a>");
  browser.println("<a href='/light2off'><button>Turn Off </button></a><br />");
  browser.println("</center>");
  browser.println("<br><br>");
  browser.println("<br><br>");
  browser.println("<h2> Data </h2>");
  browser.println("<center>");
  browser.println("<table border='5'>");
  browser.println("<tr>");
  if (digitalRead(LED))
  {
    browser.print("<td>LED is OFF</td>");
  }
  else
  {
    browser.print("<td>LED is ON</td>");
  }
  browser.println("<br />");
  if (slaveState == "1") //(digitalRead(4))
  {
    browser.print("<td>Light 2 is OFF</td>");
  }
  else
  {
    browser.print("<td>Light 2 is ON</td>");
  }
  browser.println("</tr>");
  browser.println("</table>");
  browser.println("</center>");
  browser.println("</body></html>");
  delay(1);
}
ESP32 código esclavo
En el código esclavo, nos conectaremos al servidor utilizando la dirección IP utilizada anteriormente.
N.B.: No olvide modificar y utilizar los mismos valores de ssid y contraseña que en el módulo Master para que las dos tarjetas ESP32 estén conectadas a la misma red.
//Libraries
#include <WiFi.h>

//Constants
#define LED 2
#define UPDATE_TIME 500

//Parameters
String nom = "Slave0";
const char* ssid = "*******";
const char* password = "*******";

//Variables
String command;
unsigned long previousRequest = 0;

//Objects
WiFiClient master;
IPAddress server(192, 168, 1, 44);

void setup() {
  //Init Serial USB
  Serial.begin(115200);
  Serial.println(F("Initialize System"));
  //Init ESP32 Wifi
  WiFi.begin(ssid, password);
  while (WiFi.status() != WL_CONNECTED) {
    delay(500);
    Serial.print(F("."));
  }
  Serial.print(nom);
  Serial.print(F(" connected to Wifi! IP address : ")); Serial.println(WiFi.localIP()); // Print the IP address
  pinMode(LED, OUTPUT);
}

void loop() {
  requestMaster();
}

void requestMaster( ) { /* function requestMaster */
  ////Request to master
  if ((millis() - previousRequest) > UPDATE_TIME) { // client connect to server every 500ms
    previousRequest = millis();

    if (master.connect(server, 80)) { // Connection to the server
      master.println(nom + ": Hello! my current state is x" + String(!digitalRead(LED)) + "\r");

      //answer
      String answer = master.readStringUntil('\r');   // receives the answer from the sever
      master.flush();
      Serial.println("from " + answer);
      if (answer.indexOf("x") >= 0) {
        command = answer.substring(answer.indexOf("x") + 1, answer.length());
        Serial.print("command received: "); Serial.println(command);
        if (command == "1") {
          Serial.println("LED ON");
          digitalWrite(LED, LOW);
        } else {
          Serial.println("LED OFF");
          digitalWrite(LED, HIGH);
        }
      }
    }
  }
}
Resultados
Cuando los microcontroladores están conectados a Wi-Fi y se establece la comunicación entre los dos ESP32, podemos ver que la información y los comandos se intercambian entre las dos placas. También es posible controlar los LED de las dos placas mediante los botones de la interfaz.
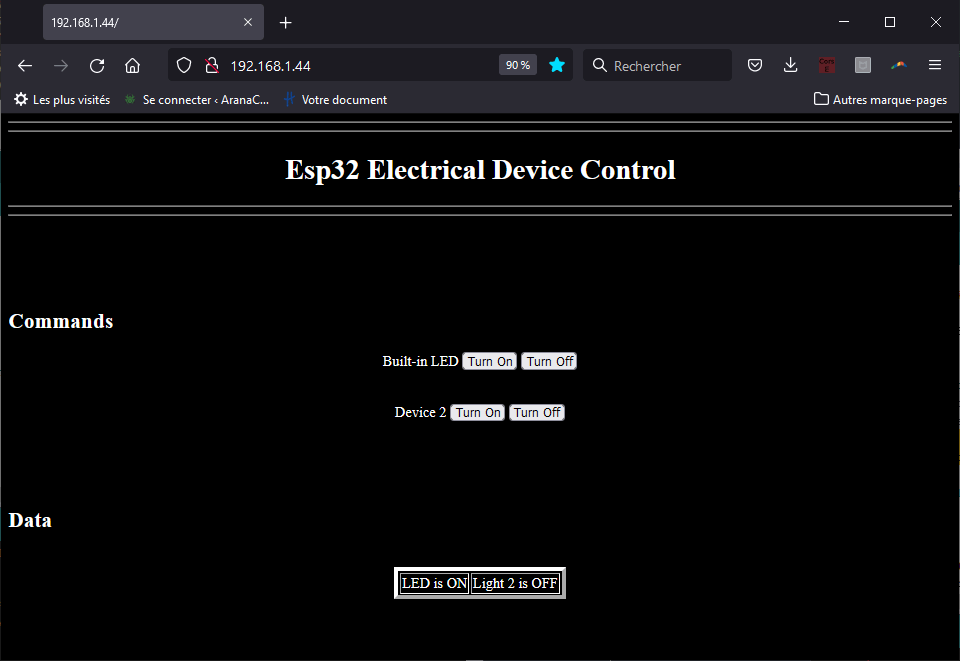
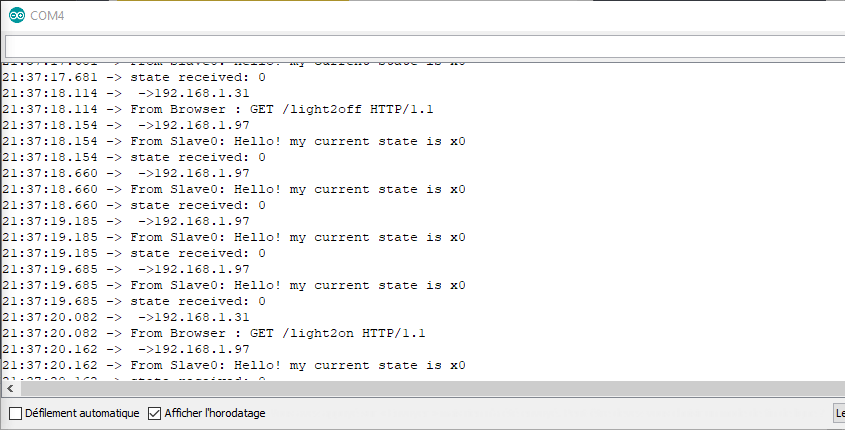
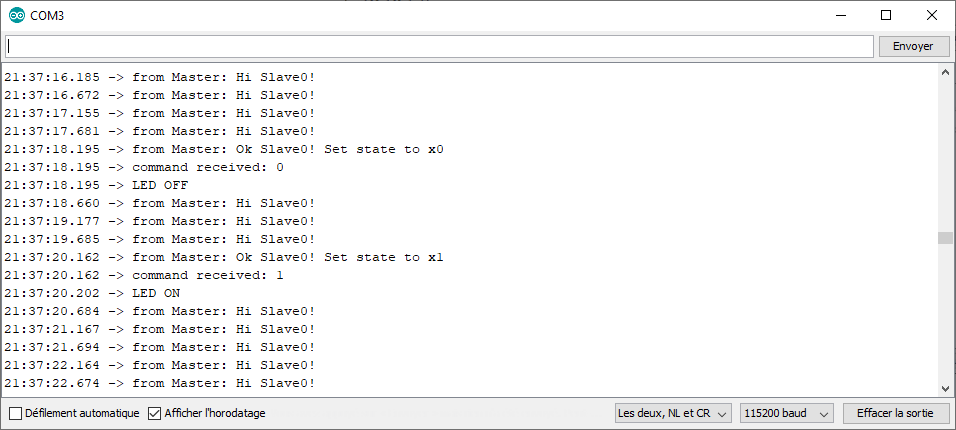
En este tutorial, hemos visto cómo hacer que dos ESP32 se comuniquen en la red Wifi local. También es posible reproducir este tutorial utilizando la tarjeta ESP32 Master en modo Access Point.
Aplicaciones
- Crear una red de Esp32 NodeMCUs (u otros microcontroladores) para gestionar diferentes dispositivos o sensores.


Que tal me interesaría mucho saber si se puede intercomunicar mucho ESP32. Como por ejemplo en un hotel, cada habitación tendría un ESP32 con sensores/actuadores y a su vez todos se puedan comunicar a un servidor en la nuve o a una compu local
Hola, sería interesante hacer la prueba. Aparentemente
Si todos los dispositivos ESP32 están conectados a la misma red y un servidor (ordenador dedicado) recupera los datos, el único límite que veo es el ancho de banda Wifi.
podría ser una mezcla de diferentes tecnologías (ex 1x serveur connected to 10x ESP32 node via Wifi, each connected to 8x ESP32 via nodeESP-NOW)