En este tutorial vamos a configurar Visual Studio Code para que pueda ejecutar C# scripts.
Instalación de Visual Studio Code
A continuación, abra Visual Studio Code
Instalar la extensión C#

Compruebe que .NET está instalado en el terminal
dotnet --versionCreación de una aplicación de consola
Crear un nuevo proyecto .NET
dotnet new console -o app
cd app
code .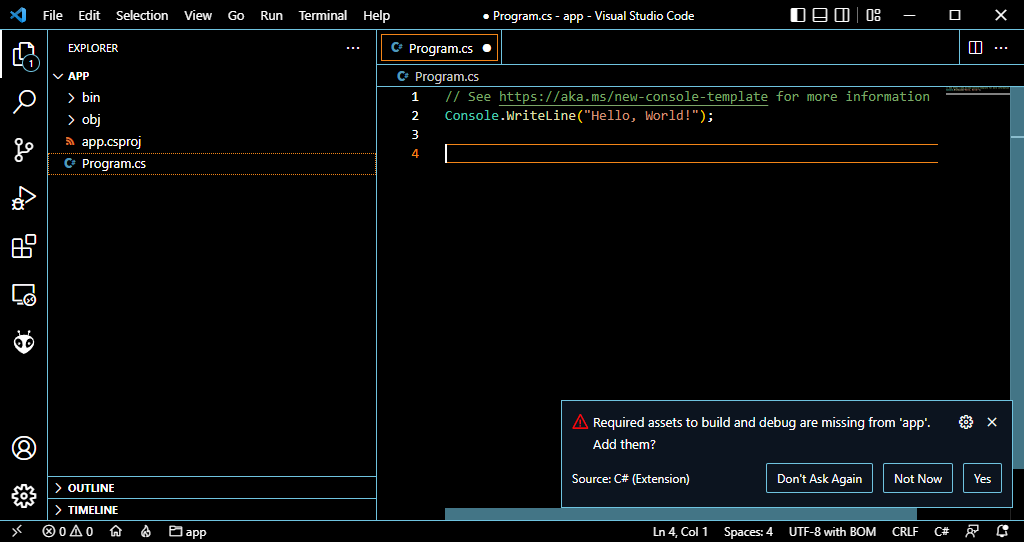
Seleccione Sí para añadir la configuración de compilación y depuración
Ejecutar el script C#
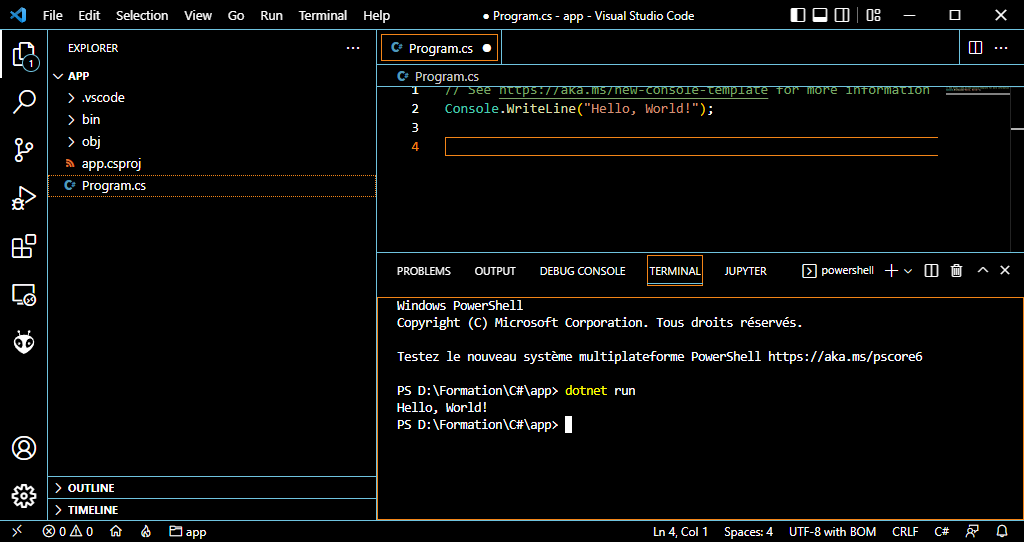
Para ejecutar el código C#
dotnet runO seleccione Ejecutar > Iniciar depuración (F5)
Añadir bibliotecas
Para añadir bibliotecas, puede introducir el siguiente comando, sustituyendo por el nombre del paquete que desea instalar
dotnet add package como opción puede seleccionar la versión que desea instalar (por ejemplo, 1.0.0)
dotnet add package --version Crear una interfaz gráfica
Puede crear una interfaz gráfica con C#
Introduzca el siguiente comando para crear un nuevo proyecto winforms (sólo Windows)
dotnet new winforms -o appgui
cd appgui
code .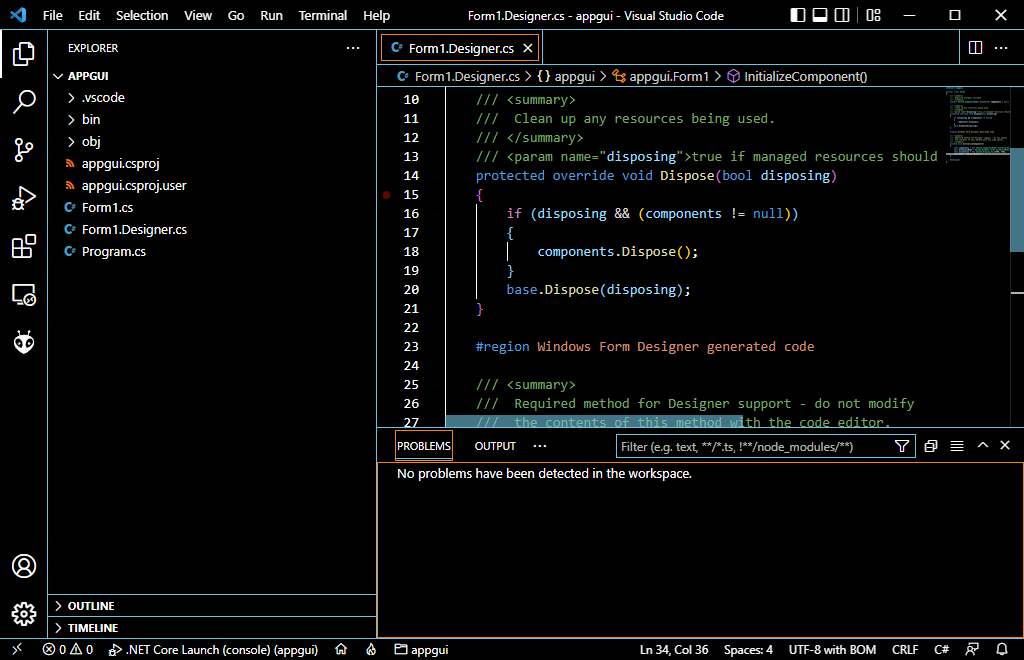
El código de Visual Studio creará varios archivos para definir una interfaz gráfica. Puedes modificar estos tres archivos para desarrollar tu interfaz. Veremos un ejemplo sencillo con una etiqueta y un botón.
- Form1Designer.cs
Este archivo contiene la definición gráfica de cada componente de la interfaz y su posición.
En este ejemplo, definimos una etiqueta y un botón contenidos en un cuadro de grupo.
N.B.: Para cada elemento, debes:
- declararlo: private System.Windows.Forms.Label label1;
- crear una instancia this.label1 = new System.Windows.Forms.Label();
- establecer los parámetros (si es necesario) this.label1.Text = «¡Hola mundo!
- colocarlo en un contenedor this.grpbox.Controls.Add(this.label1);
namespace appgui;

partial class Form1
{
    /// <summary>
    ///  Required designer variable.
    /// </summary>
    private System.ComponentModel.IContainer components = null;

    /// <summary>
    ///  Clean up any resources being used.
    /// </summary>
    /// <param name="disposing">true if managed resources should be disposed; otherwise, false.</param>
    protected override void Dispose(bool disposing)
    {
        if (disposing && (components != null))
        {
            components.Dispose();
        }
        base.Dispose(disposing);
    }

    #region Windows Form Designer generated code

    /// <summary>
    ///  Required method for Designer support - do not modify
    ///  the contents of this method with the code editor.
    /// </summary>
    private void InitializeComponent()
    {
        this.components = new System.ComponentModel.Container();
        this.AutoScaleMode = System.Windows.Forms.AutoScaleMode.Font;
        this.ClientSize = new System.Drawing.Size(400, 250);
        this.Text = "Form1";

        // components
        this.label1 = new System.Windows.Forms.Label();
        this.button1 = new System.Windows.Forms.Button();
        this.grpbox = new System.Windows.Forms.GroupBox();

        // label1
        this.label1.AutoSize = true;
        this.label1.Location = new System.Drawing.Point(50, 50);
        this.label1.Name = "label1";
        this.label1.Size = new System.Drawing.Size(50, 10);
        this.label1.TabIndex = 3;
        this.label1.Text = "Hello world!";
        //button1
        this.button1.Location = new System.Drawing.Point(50, 70);
        this.button1.Name = "button1";
        this.button1.Size = new System.Drawing.Size(50, 20);
        this.button1.TabIndex = 0;
        this.button1.Text = "Click!";
        this.button1.UseVisualStyleBackColor = true;
        this.button1.Click += new System.EventHandler(this.button1_Click);

        //grpbox
        this.grpbox.Controls.Add(this.label1);
        this.grpbox.Controls.Add(this.button1);
        this.grpbox.Location = new System.Drawing.Point(10, 10);
        this.grpbox.Name = "grpbox";
        this.grpbox.Size = new System.Drawing.Size(380, 230);
        this.grpbox.TabIndex = 0;
        this.grpbox.TabStop = false;
        this.grpbox.Text = "Group Box";

        //layout
        this.Controls.Add(this.grpbox);

    }

    private System.Windows.Forms.Label label1;
    private System.Windows.Forms.GroupBox grpbox;
    private System.Windows.Forms.Button button1;

    #endregion
}
- Formulario1.cs
Este archivo define cómo reaccionarán los componentes.
En este ejemplo, cuando se pulsa el botón, aparece un mensaje en una nueva ventana
namespace appgui;

public partial class Form1 : Form
{
    public Form1()
    {
        InitializeComponent();
    }

    private void button1_Click(object sender, EventArgs e)
    {
        MessageBox.Show("Button cliked");
    }
}
- Programa.cs
Este archivo se utiliza para lanzar la aplicación. No debería ser necesario modificar este archivo inmediatamente.
namespace appgui;

static class Program
{
    /// <summary>
    ///  The main entry point for the application.
    /// </summary>
    [STAThread]
    static void Main()
    {
        // To customize application configuration such as set high DPI settings or default font,
        // see https://aka.ms/applicationconfiguration.
        ApplicationConfiguration.Initialize();
        Application.Run(new Form1());
    }
}
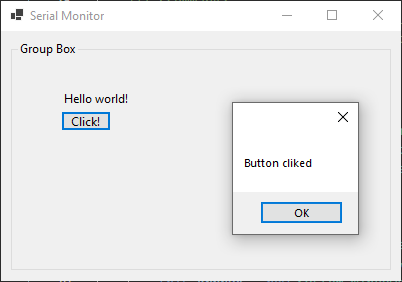
Si ejecutas el código y pulsas el botón deberías obtener el siguiente resultado
