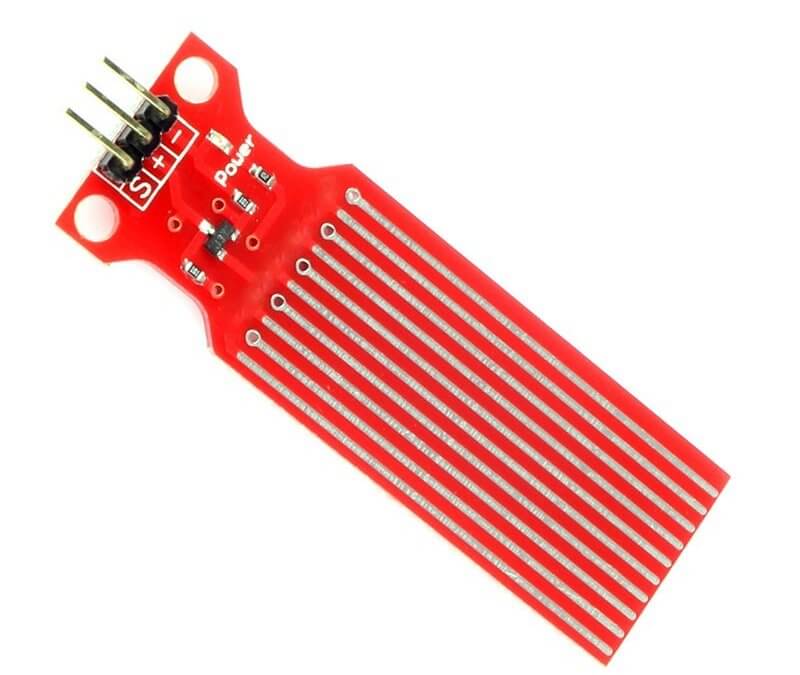
The water level sensor is designed to detect water, it can be widely used to detect precipitation, water level in a cavity or even liquid leakage. The sensor is mainly composed of three parts: an electronic connector, a 1 MΩ resistor and several lines of bare wire.
Material
- Computer
- Arduino UNO
- USB cable A Male/B Male
- Water level sensor
Principle of operation
The water level sensor operates by a series of exposed grounded copper traces interleaved with sensing traces. These traces work as a variable resistance. The presence of water on the sensor causes a short circuit between these traces which allows to detect its presence. It converts the water level into an analog output that can be directly processed by a microcontroller. The value of the signal depends on the immersion level of the sensor.
Scheme
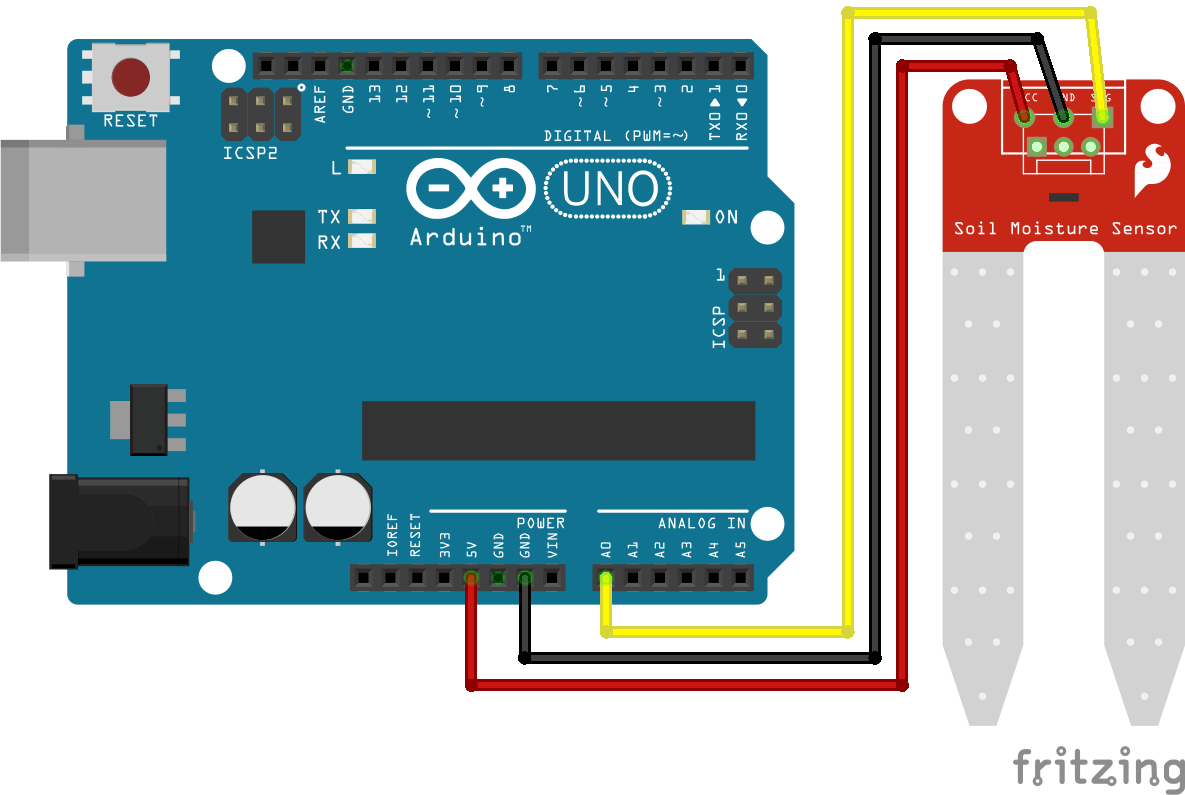
The water level sensor has 3 pins:
- GND the ground connected to the ground of the Arduino
- Vcc the power supply connected to the 5V of the Arduino (works with a power supply between 2 and 5V)
- The analog output S, connected to an analog pin of the Arduino

Code
The water level sensor is analog. It is therefore possible to read the value of the sensor on an analog input of the Arduino using the analogRead() function.
void setup()
{
  Serial.begin(9600);
}

void loop() {
  Serial.print("Water level Sensor Value:");
  Serial.println(analogRead(A0))
  delay(100);
}
Results
By dipping the sensor in a glass of water, you will be able to see the sensor value change on the serial monitor. Once the code is implemented, you can calibrate your sensor according to the water you want to detect. Thus you will get the threshold values to know if the sensor is in the open air, partially or completely immersed.
Applications
- Create an automatic watering system with a level sensor and a water pump
- Develop a flood warning system


