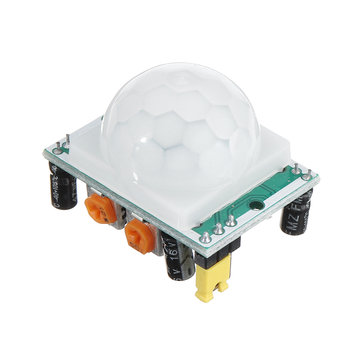
It is possible to activate a system, such as an alarm, by detecting the presence of a person using a PIR motion sensor. In home automation, it is common practice to operate devices when a person enters a room. This is made possible by motion sensors such as the Passive Infared Sensor (PIR). In this tutorial we will see how to control the PIR sensor using an Arduino microcontroller.
Hardware
- Computer
- Arduino UNO
- USB cable A Male to B Male
- PIR motion sensor
Principle of operation
Any object with a temperature above absolute zero emits infrared radiation. This can be seen in thermal camera images. The PIR sensor is equipped with two infrared-sensitive cells that will detect the infrared rays reflected or emitted by an object.
When there is no movement, the level of infrared received is the same for both cells. When an object passes by, the emission of these rays will be modified on one cell and then on the other, which will allow the movement to be detected.
The white cover, which usually covers and protects the sensor, is a multifaceted Fresnel lens that allows the infrared radiation to be concentrated and sometimes filtered on the cells.
Schematic
The PIR module can be powered directly by the microcontroller and, as it returns a status, the sensor output is connected to a digital input.
Code
The PIR sensor returns a high state (HIGH) when it detects movement and a low state (LOW) if there is nothing. It will therefore be managed as a digital input using Arduino’s digitalRead() function.
//Parameters
const int pirPin  = 2;

//Variables
bool pirStatus  = false;

void setup() {
  //Init Serial USB
  Serial.begin(9600);
  Serial.println(F("Initialize System"));
  //Init digital input
  pinMode(pirPin, INPUT);
}

void loop() {
  readPIR();
}

void readPIR( ) { /* function readPIR */
  ////Test routine for PIR
  pirStatus = digitalRead(pirPin);
  Serial.print(F("Sensor status")); Serial.println(pirStatus);
  if (pirStatus) {
    Serial.print(F("----> Detection"));
    delay(500);
  }
  delay(100);
}
Applications
- Switching on a light when a movement is detected
- Activation of an alarm upon intrusion of a person
Sources
- https://www.arduino.cc/reference/en/language/functions/digital-io/digitalwrite/
- Manage sensors with Arduino
Find other examples and tutorials in our Automatic code generator
Code Architect

