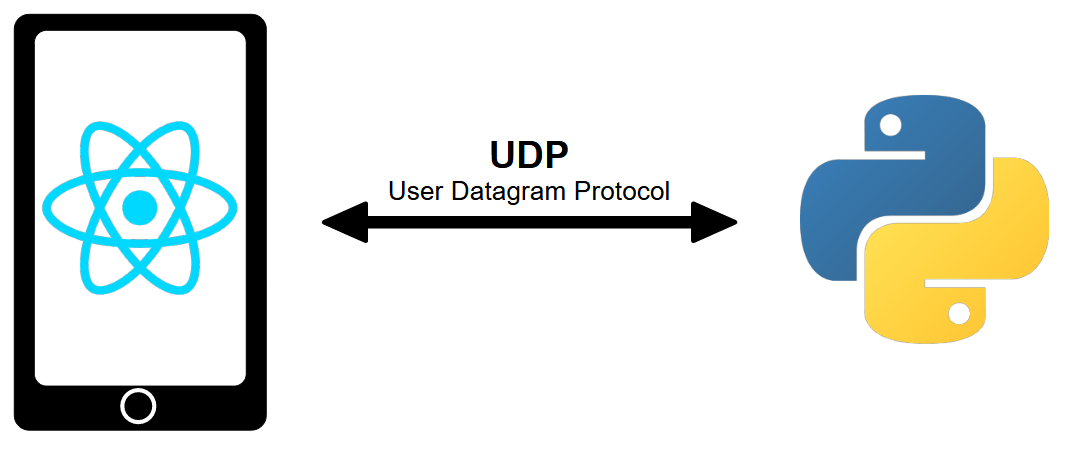
In this tutorial, we’ll set up UDP communication on a React Native application. The React Native application can act as a UDP Server or Client. We’ll use a computer with a Python script as our communication partner.
Configuring React Native
First, create a React Native UDPTerminalApp project.
Install udp and netinfo libraries
npm install react-native-udp
npm install react-native-network-info
Application code description
Import
To use the libraries, we first import their code.
   import dgram from 'react-native-udp'
   import UdpSocket from 'react-native-udp/lib/types/UdpSocket.js';
   import { NetworkInfo } from 'react-native-network-info'
Main component
Then we create the functional component that will allow us to manage Server communication.
const UDPTerminal = () =>  {
  const [isServer, setIsServer] = useState(false);
  const [connectionStatus, setConnectionStatus] = useState('');
  const [socket, setSocket] = useState<UdpSocket>();
  const [ipAddress, setIpAddress] = useState('');
  const [ipServer, setIpServer] = React.useState('');
  const [messageText, setMessageText] = useState("");
  const [messageToSend, setMessageToSend] = useState("Hello from server");
const [receivedMessage, setReceivedMessage] = useState("");- isServer is True if the application behaves as a server and false if it behaves as a client
- connectionStatus displays the connection status
- socket contains the socket variable of the communication
- ipAddress contains the IP address of the Android device on the network
- ipServer contains the IP address entered on the
- messageText contains the text typed on the interface
- messageToSend contains the message to be sent to the client or server
- receivedMessage contains messages received from the client or server
UDP communication management
The code used to manage UDP communication, whether in server or client mode, is entirely contained in a useEffect hook.
  useEffect(() => {
    const fetchIpAddress = async () => {
      const ip = await NetworkInfo.getIPV4Address();
      setIpAddress(ip);
      console.log("ip adresses ; ", ip)
    };

    fetchIpAddress();

    if (isServer) {
      // Configure app as server
      const server = dgram.createSocket('udp4');

      server.on('message', (data, rinfo) => {

        server.send(messageToSend, undefined, undefined, rinfo?.port, rinfo?.address, (error) => {
          if (error) {
            console.log('Error sending message:', error);
          } else {
            console.log('Message sent correctly');
          }
        });
        console.log('Received message:', data.toString());
        setReceivedMessage(receivedMessage => receivedMessage+data.toString()+"\n")
      });

      server.on('listening', () => {
        console.log('Server listening on port:', server.address().port);
        setConnectionStatus(`Server listening on port ${server.address().port}`);
      });
      try{
        setReceivedMessage("");
        server.bind(8888);
        setSocket(server);
      }catch(error){
        console.log("error binding server",error);
      }

    } else {
      setConnectionStatus(`Server disconnected`);
      // Configure app as client
      const client = dgram.createSocket('udp4');
      try{
        setReceivedMessage("");
        client.bind(8887);
        setSocket(client);
      }catch(error){
        console.log("error binding client",error);
      }

    }

    return () => {
      socket && socket.close();
    };
  }, [isServer, messageToSend, messageText]);
The fetchIpAdress function retrieves the device’s IP address.
In server mode
- we create the dgram.createSocket socket
- when a message is received: we send messageToSend to the client
- Then we display the message received
- we connect the server to port 8888
In customer mode
- we create the dgram.createSocket socket
- we link the customer to port 8887
In the following function
- we send the message messageToSend to the server
- then we wait for the response, which we display in receivedMessage
Send message function
We also define a function to update the message sent in Server mode and to send the message in Client mode.
  const sendMessage = () => {
    setMessageToSend(messageText);
    if (isServer) return;

    const client = socket;
    console.log("send message to "+ipServer)
    client.send(messageToSend, undefined, undefined, 8888, ipServer, (error) => {
      if (error) {
        console.log('Error sending message:', error);
      } else {
        console.log('Message sent correctly');
      }
    });
    client.on('message', async (message: { toString: () => string; }) => {
      setReceivedMessage(receivedMessage+message.toString()+"\n")
    });
  };
Display definition
Finally, the application’s graphical interface is defined as follows:
- Application title
- Device IP address
- A button to select client or server mode
- An insert for editing the message to be sent
- A send button
- An insert for specifying the server’s IP address in client mode
- A text box to display messages received
return (
    <View style={styles.mainBody}>
      <Text
        style={styles.mainTitle}>
        AC UDP Terminal
      </Text>
      <ScrollView>

      <View style={styles.deviceItem}>
                      <View>
                        <Text style={styles.deviceName}>{ipAddress}</Text>
                        <Text style={styles.deviceInfo}>{connectionStatus}</Text>
                      </View>
                      <TouchableOpacity
                        onPress={() => setIsServer(!isServer)}
                        style={styles.deviceButton}>
                        <Text
                          style={styles.buttonText}>
                          {isServer ? 'Server' : 'Client'}
                        </Text>
                      </TouchableOpacity>
                    </View>


      <View
              style={styles.inputBar}>
              <TextInput
                style={styles.textInput}
                placeholder="Enter a message"
                value={messageText}
                onChangeText={(text) =>    setMessageText(text)
                }
              />
              <TouchableOpacity
                        onPress={() => sendMessage()
                        }
                        style={[styles.sendButton]}>
                        <Text
                          style={styles.buttonText}>
                          SEND
                        </Text>
                      </TouchableOpacity>
        </View>

      <TextInput
        placeholder="Server IP"
        onChangeText={setIpServer}
        value={ipServer}
      />
      <Text>Received Message:</Text>
              <TextInput
              editable = {false}
              multiline
              numberOfLines={20}
              maxLength={300}
              style={styles.textOutput} >
                    {receivedMessage}
              </TextInput>
      </ScrollView>
    </View>
  );
N.B.: the interface style is defined in the
React-Native UDP Client – Python UDP Server
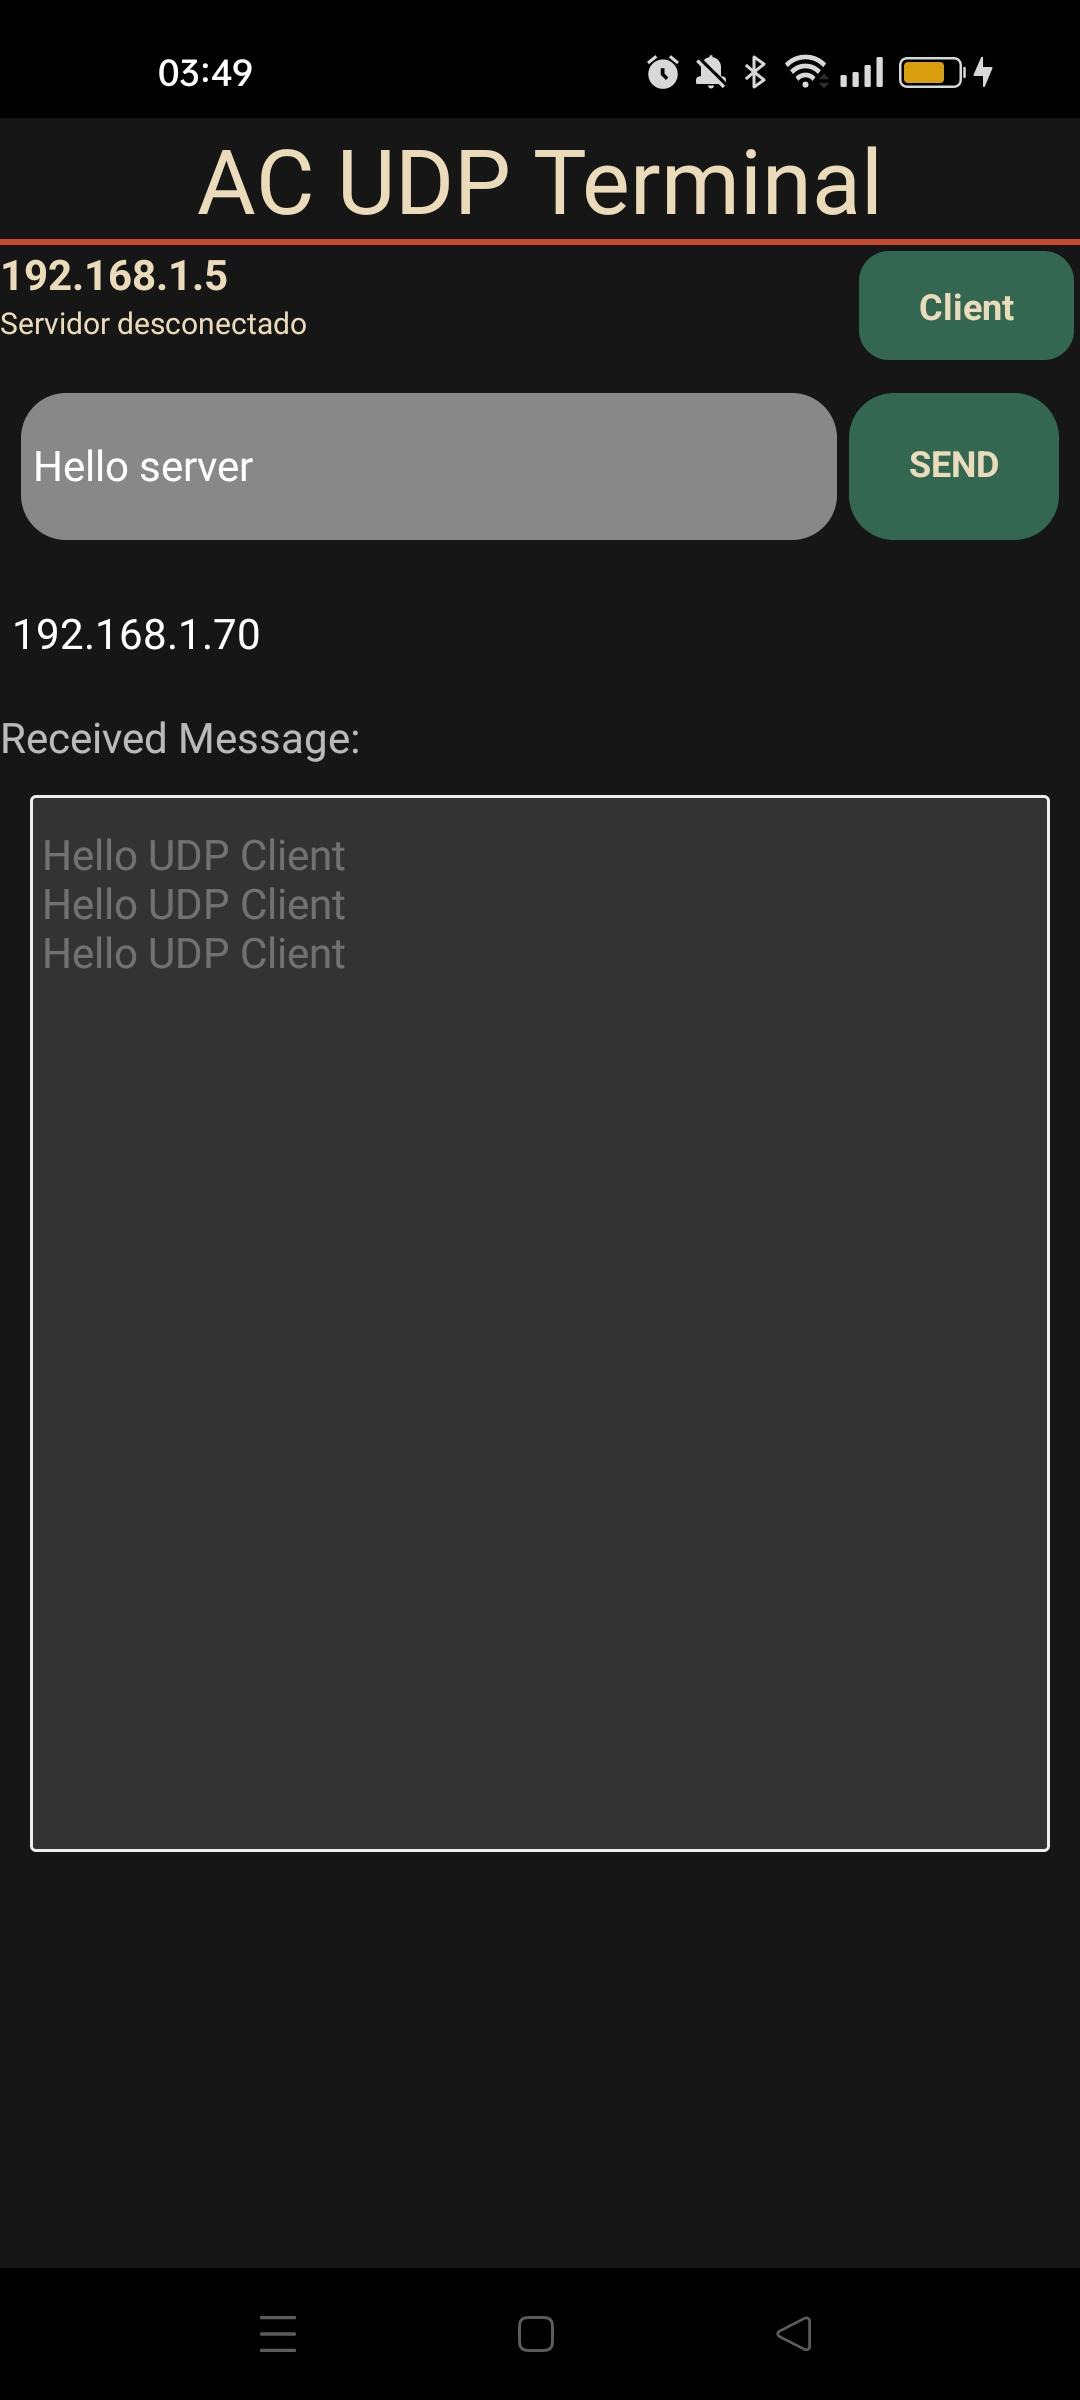
In this example, we configure the application as a client and the computer as a server. We’ll send a message from the application to the server, which will send a response back to the client.
Python UDP Server Code
#!/usr/bin/env python
# -*- coding: utf-8 -*-
import socket

localIP     = "0.0.0.0" #"127.0.0.1"
localPort   = 8888
bufferSize  = 1024

msgFromServer       = "Hello UDP Client"
bytesToSend         = str.encode(msgFromServer)

# Create a datagram socket
UDPServerSocket = socket.socket(family=socket.AF_INET, type=socket.SOCK_DGRAM)

# Bind to address and ip
UDPServerSocket.bind((localIP, localPort))
print("UDP server up and listening on port {}".format(localPort))

# Listen for incoming datagrams
while(True):

	data,addr = UDPServerSocket.recvfrom(bufferSize)
	print("{} > {}".format(addr,data))

	# Sending a reply to client
	UDPServerSocket.sendto(bytesToSend, addr)
N.B.: To listen on all local addresses we use 0.0.0.0. If you wish to test communication between client and server on the same computer, you can use the address 127.0.0.1.
On the application, in the ServerIp box, enter the computer’s IP address (here: 192.168.1.70). Modify the message to be sent, then press the “SEND” button.

Python terminal
UDP server up and listening on port 8888
('192.168.1.5', 8887) > b'Hello server'
('192.168.1.5', 8887) > b'Hello server'
On the Python terminal, we receive the “Hello server” message sent from the application. The UDP server returns “Hello UDP Client”.
React-Native UDP Server – Python UDP Client
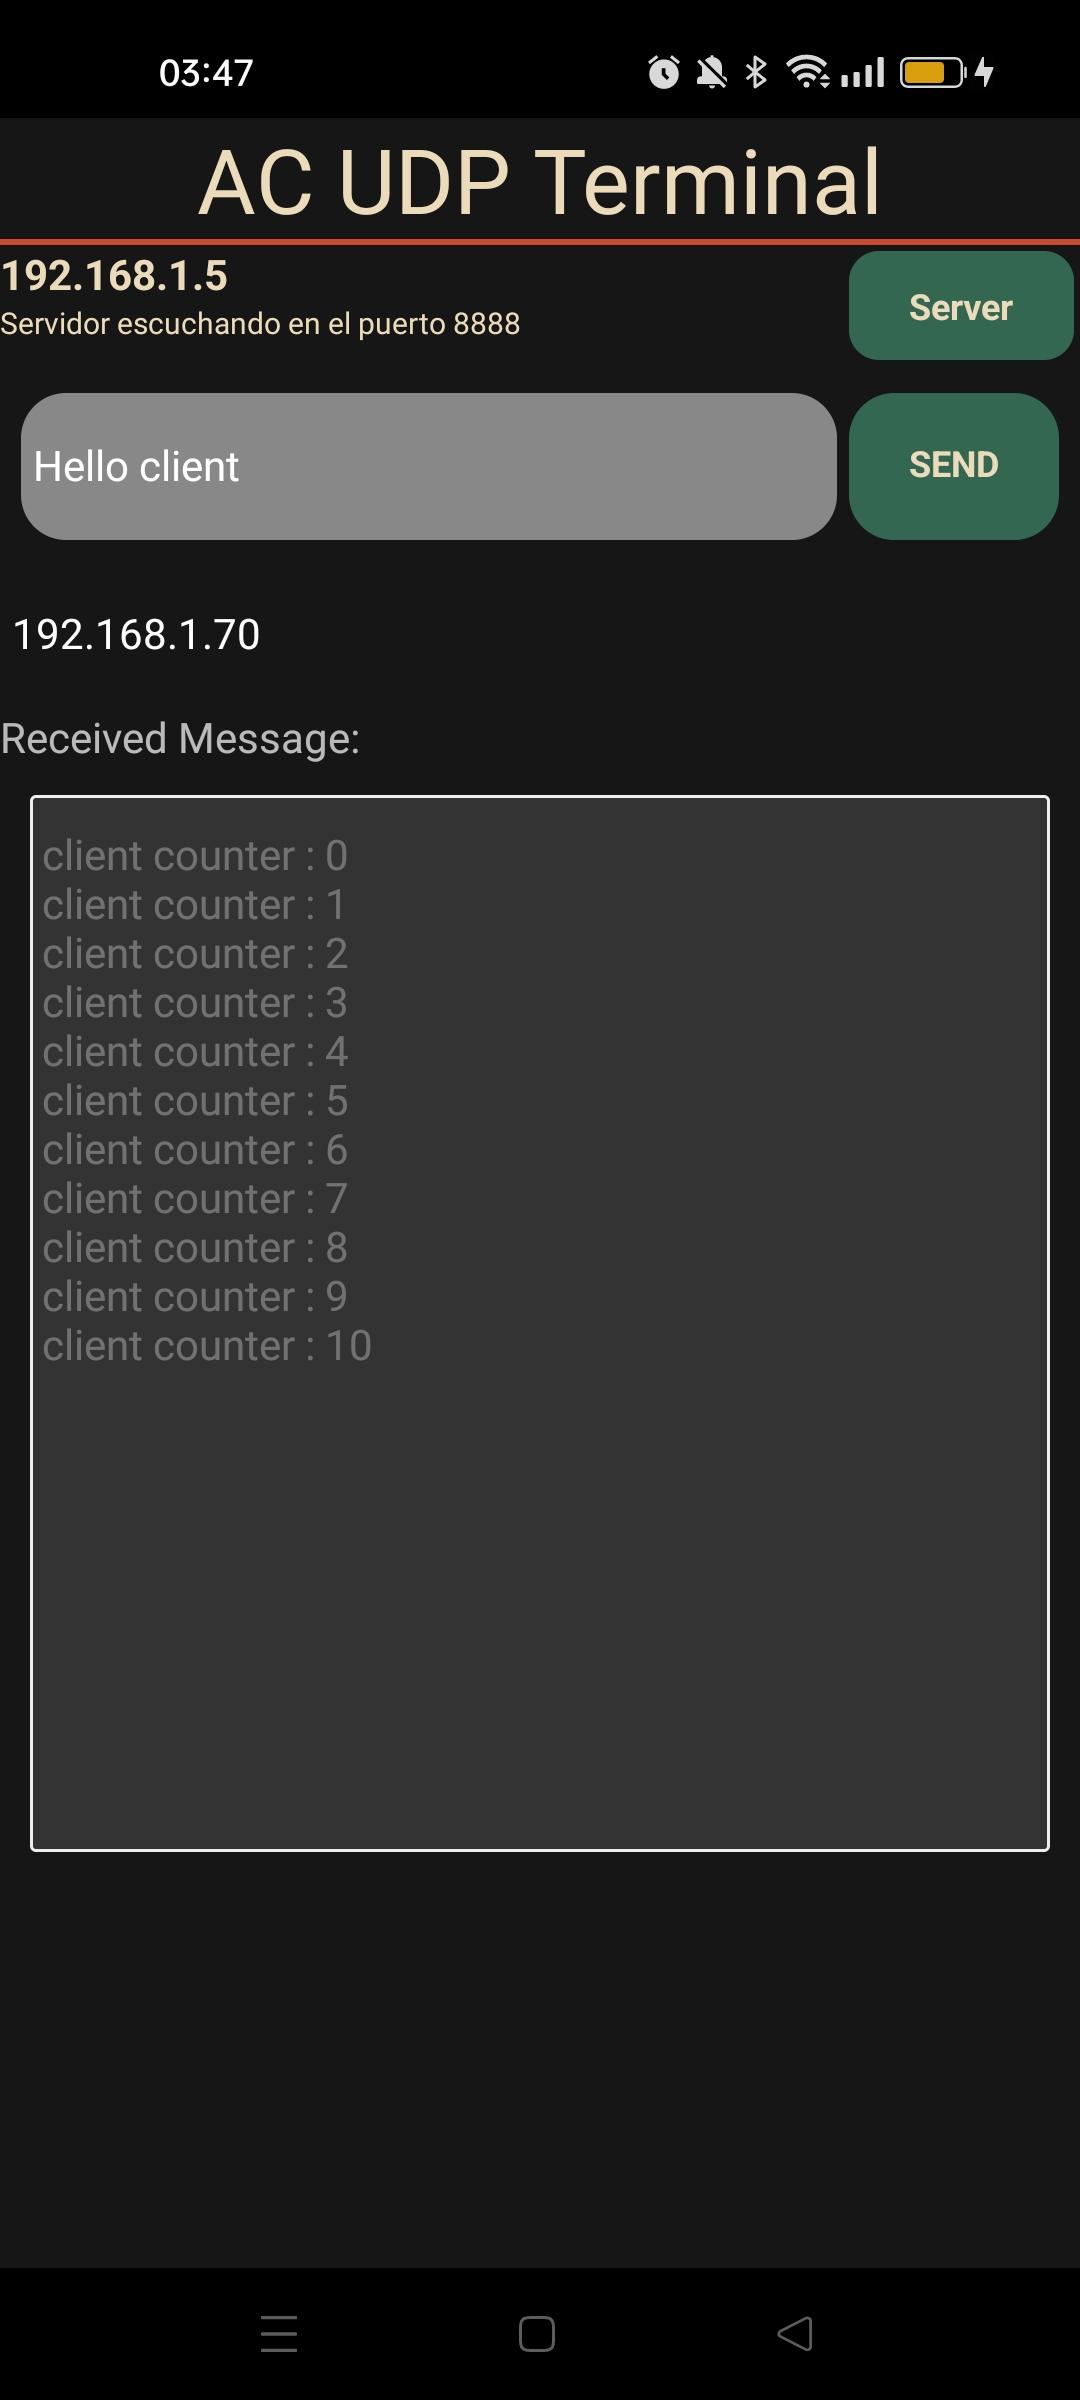
Here, we configure the application as a server and the computer as a client. In the Python code, we enter the server’s IP address.
Python UDP Client
#!/usr/bin/env python
# -*- coding: utf-8 -*-
import socket
import time
HOST = "192.168.1.5" #Server IP #"127.0.0.1" local address
PORT = 8888
bufferSize = 1024

counter=0
while True:
	# Create a UDP socket at client side
	with socket.socket(family=socket.AF_INET, type=socket.SOCK_DGRAM) as client:
		# Send to server using created UDP socket
		client.sendto(str.encode("client counter : "+str(counter)), (HOST,PORT))
		data,addr= client.recvfrom(bufferSize)
		msg = "{} > {}".format(addr,data)

		print(msg)
	counter+=1
	time.sleep(1)
Python terminal
('192.168.1.5', 8888) > b'Hello client '
('192.168.1.5', 8888) > b'Hello client '
Full application code
App.tsx
/**
 * npm install react-native-udp
 * npm install react-native-network-info
 *
 */

import React, {useState, useEffect} from 'react';
import {
  View,
  ScrollView,
  Text,
  TextInput,
  PermissionsAndroid,
  Platform,
  TouchableOpacity } from 'react-native';
   import dgram from 'react-native-udp'
   import UdpSocket from 'react-native-udp/lib/types/UdpSocket.js';
   import { NetworkInfo } from 'react-native-network-info'
   import {styles} from "./src/styles/styles.jsx"


const UDPTerminal = () =>  {
  const [isServer, setIsServer] = useState(false);
  const [connectionStatus, setConnectionStatus] = useState('');
  const [socket, setSocket] = useState<UdpSocket>();
  const [ipAddress, setIpAddress] = useState('');
  const [ipServer, setIpServer] = React.useState('');
  const [messageText, setMessageText] = useState("");
  const [messageToSend, setMessageToSend] = useState("Hello from server");
  const [receivedMessage, setReceivedMessage] = useState("");

  useEffect(() => {
    const fetchIpAddress = async () => {
      const ip = await NetworkInfo.getIPV4Address();
      setIpAddress(ip);
      console.log("ip adresses ; ", ip)
    };

    fetchIpAddress();

    if (isServer) {
      // Configure app as server
      const server = dgram.createSocket('udp4');

      server.on('message', (data, rinfo) => {

        server.send(messageToSend, undefined, undefined, rinfo?.port, rinfo?.address, (error) => {
          if (error) {
            console.log('Error sending message:', error);
          } else {
            console.log('Message sent correctly');
          }
        });
        console.log('Received message:', data.toString());
		if(receivedMessage.length>300){
          setReceivedMessage("");
        }
        setReceivedMessage(receivedMessage => receivedMessage+data.toString()+"\n")
      });

      server.on('listening', () => {
        console.log('Server listening on port:', server.address().port);
        setConnectionStatus(`Server listening on port ${server.address().port}`);
      });
      try{
        setReceivedMessage("");
        server.bind(8888);
        setSocket(server);
      }catch(error){
        console.log("error binding server",error);
      }

    } else {
      setConnectionStatus(`Server disconnected`);
      // Configure app as client
      const client = dgram.createSocket('udp4');
      try{
        setReceivedMessage("");
        client.bind(8887);
        setSocket(client);
      }catch(error){
        console.log("error binding client",error);
      }

    }

    return () => {
      socket && socket.close();
    };
  }, [isServer, messageToSend, messageText]);

  const sendMessage = () => {
    setMessageToSend(messageText);
    if (isServer) return;

    const client = socket;
    console.log("send message to "+ipServer)
    client.send(messageToSend, undefined, undefined, 8888, ipServer, (error) => {
      if (error) {
        console.log('Error sending message:', error);
      } else {
        console.log('Message sent correctly');
      }
    });
    client.on('message', async (message: { toString: () => string; }) => {
	  if(receivedMessage.length>300){
          setReceivedMessage("");
      }
      setReceivedMessage(receivedMessage+message.toString()+"\n")
    });
  };

  return (
    <View style={styles.mainBody}>
      <Text
        style={styles.mainTitle}>
        AC UDP Terminal
      </Text>
      <ScrollView>

      <View style={styles.deviceItem}>
                      <View>
                        <Text style={styles.deviceName}>{ipAddress}</Text>
                        <Text style={styles.deviceInfo}>{connectionStatus}</Text>
                      </View>
                      <TouchableOpacity
                        onPress={() => setIsServer(!isServer)}
                        style={styles.deviceButton}>
                        <Text
                          style={styles.buttonText}>
                          {isServer ? 'Server' : 'Client'}
                        </Text>
                      </TouchableOpacity>
                    </View>


      <View
              style={styles.inputBar}>
              <TextInput
                style={styles.textInput}
                placeholder="Enter a message"
                value={messageText}
                onChangeText={(text) =>    setMessageText(text)
                }
              />
              <TouchableOpacity
                        onPress={() => sendMessage()
                        }
                        style={[styles.sendButton]}>
                        <Text
                          style={styles.buttonText}>
                          SEND
                        </Text>
                      </TouchableOpacity>
        </View>

      <TextInput
        placeholder="Server IP"
        onChangeText={setIpServer}
        value={ipServer}
      />
      <Text>Received Message:</Text>
              <TextInput
              editable = {false}
              multiline
              numberOfLines={20}
              maxLength={300}
              style={styles.textOutput} >
                    {receivedMessage}
              </TextInput>
      </ScrollView>
    </View>
  );
}

export default UDPTerminal;
style.jsx
/* ./src/styles/styles.jsx */
import {StyleSheet, Dimensions} from 'react-native';
/**
 * links to palette
 *  https://colorhunt.co/palette/161616346751c84b31ecdbba
 *
*/
//parameters
let BACKGROUND_COLOR = "#161616"; //191A19
let BUTTON_COLOR = "#346751"; //1E5128
let ERROR_COLOR = "#C84B31"; //4E9F3D
let TEXT_COLOR = "#ECDBBA"; //D8E9A8

const windowHeight = Dimensions.get('window').height;
export const styles = StyleSheet.create({
  mainBody: {
    flex: 1,
    justifyContent: 'center',
    height: windowHeight,
    color:TEXT_COLOR,
    backgroundColor: BACKGROUND_COLOR,
  },

  mainTitle:{
    color: TEXT_COLOR,
    fontSize: 30,
    textAlign: 'center',
    borderBottomWidth: 2,
    borderBottomColor: ERROR_COLOR,
  },

  scanButton: {
    backgroundColor: BUTTON_COLOR,
    paddingBottom: 10,
    paddingTop: 10,
    borderRadius: 10,
    margin: 2,
    marginBottom: 10,
    marginTop: 10,

    paddingHorizontal: 20,
    fontWeight: 'bold',
    fontSize: 12,
  },

  buttonText: {
    color: TEXT_COLOR,
    fontWeight: 'bold',
    fontSize: 12,
	  textAlign: 'center',
  },

  noDevicesText: {
    color: TEXT_COLOR,
    textAlign: 'center',
    marginTop: 10,
    fontStyle: 'italic',
  },
  deviceItem: {
    flexDirection: 'row',
    justifyContent: 'space-between',
    marginBottom: 2,
  },
  deviceName: {
    color: TEXT_COLOR,
    fontSize: 14,
    fontWeight: 'bold',
  },
  deviceInfo: {
    color: TEXT_COLOR,
    fontSize: 10,
  },
  deviceButton: {
    backgroundColor: BUTTON_COLOR,
    padding: 10,
    borderRadius: 10,
    margin: 2,
    paddingHorizontal: 20,
    fontWeight: 'bold',
    fontSize: 12,
  },

  inputBar:{
    flexDirection: 'row',
    justifyContent: 'space-between',
    margin: 5,
  },

  textInput:{
    backgroundColor: '#888888',
    margin: 2,
    borderRadius: 15,
    flex:3,
  },

  sendButton: {
  backgroundColor: BUTTON_COLOR,
  padding: 15,
  borderRadius: 15,
  margin: 2,
  paddingHorizontal: 20,
  },

  textOutput:{
    backgroundColor: '#333333',
    margin: 10,
    borderRadius: 2,
    borderWidth: 1,
    borderColor: '#EEEEEE',
    textAlignVertical: 'top',
  }

});
Applications
- Control your Arduino, ESP32 or Raspberry Pi project with a single application


